Category Programming

Some times life gets in the way of training. Whether it’s a surprise work project, family issues, or forced physical activity, it can throw off a well-intentioned strength program. The best way to mitigate the damage is by trying to hit the most important lifts the way the program wanted (i.e. getting a bit of volume if it was supposed to be a volume day). This might mean performing an abbreviated training session by cutting some exercises. Other options include removing a whole training day, shifting the entire week forward or backward a day, or having some light or medium sessions before getting back into heavy training.

But there are some of you out there that can’t even commit to a regular template because your schedule is so erratic — like parents with a newborn baby, shift workers, nurses, fire fighters, police officers, and military personnel. I see this the most in special operations guys; training, missions, or scheduled physical training will interfere with training templates.

The following is what I like to program for these populations — especially SOF guys — that need to tack quality strength training onto their demanding schedule.

Categories

There are three or four categories that will comprise a strength training session. There is the Main Lift, a Pressing Movement, Assistance Work (or Pulling Movement), and a Trunk Builder. The trainee will pick one exercise from each category for a given session. The more deficient a trainee is in a given area of strength or muscular balance, the more they should emphasize that weakness in their week.

Deadlifts don't have to be back breaking to be effective

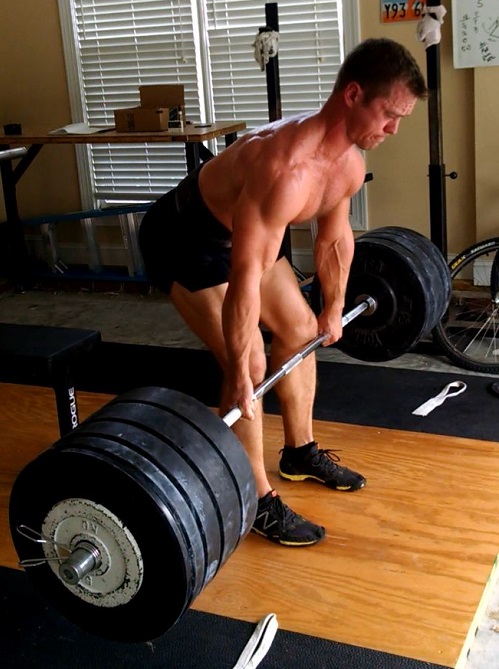
Deadlifts don’t have to be back breaking to be effective

Having categories allows the trainee to pick what exercises they can do based on what other stress they have had to endure in the week. For example, if there has been a lot of pounding on the knees via running or rucking, then squatting or cleans may not be desirable and will only limit recovery. Instead, that trainee may choose to do medium deadlifts.

Also, each session doesn’t have to be “balls to the wall”. Even doing a light or medium session with basic barbell exercises will maintain or build strength, muscularity, and prevent injuries. Hard charging athletes and SOF guys typically need to be taught the concept of rest or lower stress training.

The category method is essentially an organized autoregulation of strength training. It still provides a good systemic stress and if two or three sessions are preformed a week, then strength can be maintained or built on top of a rigorous schedule.

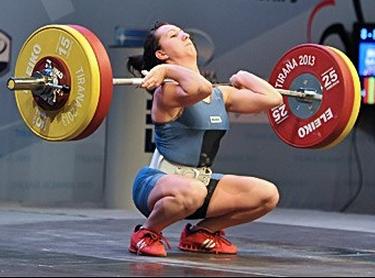
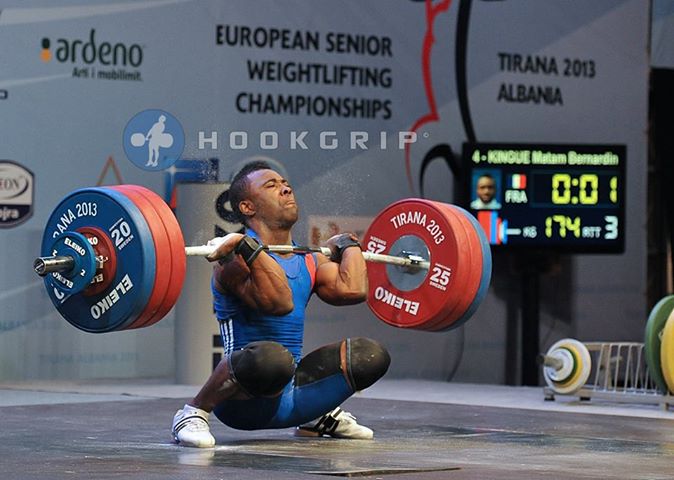
Main Lifts include squat, deadlift, power clean and jerk, and front squat.

Presses include press, bench press, and push press.

Assistance Work includes pull-ups, chin-ups, barbell rows, and RDLs.

Trunk Builders include side planks, Turkish get-ups, and spinal stabilization exercises (e.g. Stuart McGill stuff).

Note the exercises are all compound movements that work lots of joints and musculature. If you have limited time to strength train — as SOF personnel often do — then make the most of that time with movements that use large muscles that take the major joints through a full range of motion. Prehab/Rehab and Mobility work is not included here as it should be a separate, yet consistent, element in a training program.


Mike uses front squats in his program to build his squat and stone lifting strength. 


The trainee can vary the above exercises (i.e. they can perform cleans by themselves or clean and jerks instead of the power variation), but exercises don’t need to be cute. Chains, bands, or weird-ass partial movements are unnecessary for most athletes. Once a good strength base has been established (in the barbell lifts as well as balanced musculature), training can shift into more explosive or speed training to maximize the strength-to-weight ratio, but most athletes and SOF guys are in a perpetual state of being beaten down and recovering that a shift in training usually isn’t necessary.

Generally the Main Lifts and Presses are done for three sets of three to five reps whereas Assistance Work is done for three to five sets of five to ten reps. Certain exercises will require a different set and rep scheme — like deadlifts, clean and jerks, power cleans, and Turkish Get-Ups — but their inclusion is more important than their rep schemes.

I keep referencing SOF guys because I made this template when programming for them, but this can work for any person who has a crazy schedule or simply wants more freedom and variation in their program. If you’re busy or getting beaten down throughout the week, try this Category Method of programming and choose exercises you want to focus on for a couple of months. Even if your schedule isn’t crazy, this type of programming may give you some stimulating variety in your training yet still focus on a handful of lifts you want to improve on.

This kind of template will allow someone to be consistent in their training regardless of what else is going on in their life. And with strength and muscularity, consistency is the first step to success.


Chalk Talk #3 – A Word On Preparation

Some people want to be bigger. Some want less body fat. Everyone wants to be stronger. There’s a recurring theme with all of these goals: they can’t be accomplished by merely going to the gym. Performance, aesthetics, fitness, or health are all optimized by doing more than just a training session.

Today’s Chalk Talk briefly touches on the importance of preparation. How can you better prepare your nutrition? Training sessions? Mobility? Sleep? Relaxation? Post your answers to comments along with what you’ll do to improve.

Low Bar vs High Bar Squat, Part 2

A couple of years ago I wrote “Low Bar vs High Bar Squat” and it is still one of the most visited, and argued, posts on this site. I re-read the post and felt the need to update some of the information.

In the first post, I compared the positioning, mechanics, and utility of the high bar and low bar squats. All bickering aside, my final recommendation on which squat to use was:

If you’re gonna be a powerlifter, then use the low bar. If you’re going to compete in Olympic weightlifting, then use the high bar. If you have deficiencies in one area, then the other squat can improve that deficiency. If you can do both reasonably well and aren’t training for one of the barbell sports, then use both.

I do want to reiterate one point, and that is how the low bar squat should not be used for competitive weightlifting. Since weightlifting elements are common in CrossFit competition, I would also not predominantly use the low bar squat in CrossFit programming unless it was in the off-season. This is not any kind of attack on Mark Rippetoe or anyone who promotes the use of the low bar; the low bar is just not efficient for those purposes. Low barring will teach a trainee an inappropriate motor pathway for weightlifting as well as incorrectly developing the hip and thigh musculature.

To my knowledge I’m the one of the few people, if not the only one, who has gone to a USAW National event by primarily low bar back squatting. It definitely made receiving positions in the clean and snatch unnecessarily difficult as well as created mechanical problems (i.e. pitching forward when trying to squat out of the receiving position). After high barring consistently and dropping about 15 pounds of body weight, I was hitting the same PR snatch and CJ numbers with a weaker squat, and it was partially due to bettering the motor pathway of my receiving position and developing the musculature in a way that supports that pathway (The other variable of my improved numbers was that I significantly improved my weightlifting technique).

From a mechanical analysis perspective, it doesn’t make sense to low bar for weightlifting and it has not proved to be effective in my training or anyone I have coached. But enough about me, for gods’ sakes, let’s get to the amendments I have about the original Low Bar vs. High Bar article.

Hamstring tension during the high bar squat

In the first article I made a blanket statement saying, “the (high bar squat) ascent begins with zero hamstring tension due to knee flexion”. To review, if there is too much knee flexion, then there is not tension in the hamstrings since they cross both the knee and the hip. Yet, saying that all high bar squats have zero hamstring tension at the bottom position is not correct in all situations.

This is an ATG squat

This is an ATG squat

There are different ways to high bar squat. One method used by weightlifters is essentially collapsing into the bottom and allowing the backs of the hamstrings to slam onto the calves in complete knee flexion. The knees usually jut forward and some people say the rebound occurs off of the ligaments of the knees, though it’s probably a combination of the soft tissue around the ankles, knees and hips. The rebound off the soft tissue and joints is used as a rebound to drive the weight up. It’s similar to catching a clean or snatch very quickly. This can be called “ass to grass” or ATG squats. Another method is similar, except instead of crashing into the bottom position, the weight is lowered under control until the same bottom position is met. These are also referred to as ATG squats, but the weight is lowered under tension.

This is a non-ATG high bar squat

This is a non-ATG high bar squat

Lastly, the bottom position of a high bar squat can be a couple of inches below parallel, much like the low bar squat. To quantify this, the crease of the hip would need to be at a lower level than the knee cap (i.e. the point in which the head of the femur articulates with the acetabulum would be lower than the top of the patella). The weight would be controlled to this bottom position, and then squatted up.

While there is more knee flexion than in a low bar squat, there is not complete knee flexion and therefore not complete slackening in the hamstring. The hamstring is obviously much more slack than a low bar squat, but it will have some tension, especially when the trainee is externally rotating the hips effectively. External hip rotation effectively stretches out both the adductors and at least the medial hamstrings, therefore it creates tension around the hip. This is how I coach the high bar squat, especially with beginners.

All of the text in this section serves to show that I no longer think there is zero tension at the bottom of a non-ATG high bar squat.

Net anterior/posterior knee forces during the high bar squat

This is a mega ATG squat that is rebounding off of all of the soft tissue

This is a mega ATG squat that is rebounding off of all of the soft tissue

And all of the above text is important to make this point right here. Since there is adductor and hamstring tension applied in a non ATG high bar squat, these muscles apply a posterior force on the tibia. Therefore, the net force is not entirely anterior and therefore not as abrasive to the knees as originally thought. ATG squats will yield significantly higher anterior stress (i.e. the front of the knees), but ATG and regular high bar squats can still recruit hamstring tension on the ascent. If there is tension at the bottom of a non-ATG squat, and there is hamstring tension on the ascent (due to the hamstrings maintaining the back angle by their attachment on the pelvis), then the high bar squat can be excused from “knee wrecking” accusations.

In order to provide this tension the trainee would need to properly externally rotate at the hip, therefore making the high bar squat more difficult to master than I made it out to be in the first article when I said, “To learn how to high bar squat, put a bar on your back and squat all the way down with your knees shoved out.” A quality high bar squat will require good external rotation (to be discussed in another post and video). 

The stretch reflex is still present in a high bar squat

Despite the pad, this is a pretty good high bar squat. And impressive if real

Despite the pad, this is a pretty good high bar squat. And impressive if real.

Because there is hamstring and adductor tension at the bottom of a non ATG high bar squat, there is tension to execute a stretch reflex. The stretch reflex is one of the most important qualities of a low bar squat. Once a trainee starts mastering the low bar mechanics, I teach them how to “bounce” out of the hole with hip drive. The same thing can happen in the high bar squat, yet the intent and cues are different. Whereas in the low bar the trainee is aiming to “push the butt up” (a specific cue I found to be better than “drive the butt/hip up”), the high bar squatter will “drive the heels” while maintaining the external rotation.

Overall, the point in this section is to state that there is not complete knee flexion in a high bar squat, there is adductor and hamstring tension, and therefore there is a stretch reflex off of these muscles when coming out of the hole.

There is a difference

One issue that pops up occasionally is the idea that there is not a difference between the high bar and low bar. I guess the point is that there is not a mechanical difference, an adaptation difference, or that it doesn’t matter which one you do.

Some people may not have a noticeable difference in seeing or executing the two types of squat if they are a) very immobile, b) very uncoordinated, or c) squat with a wide-geared-powerlifting stance. Having crappy mobility would make it hard to see a difference between the two squat variants. Crappy mobility in the hips, knees, and ankles, would prevent a proper bottom position in a high bar. Crappy shoulder mobility would prevent a good rack in a high or low bar position (I’ve seen both). Therefore, when they attempt one or the other squat version, it just turns into a bastardized version of whatever their mobility permits.

The uncoordinated trainee may have the mobility to rack the bar or get into a bottom position, but he doesn’t have the coordination (or coaching) to execute the squat version.

Lastly, wide stance squatters aim to have vertical shins, sit back very far, and lean over to achieve hip flexion. This style of squatting — which I am not a fan of — developed in order to take advantage of gear that resists hip flexion (i.e. it helps extend the hips AKA squat up). Wide stance squatting relies on gear instead of good external hip rotation to provide force. Wide stance squatting will also look nearly the same regardless if the bar is placed on the traps (high bar) or on the rear delts (low bar), therefore there won’t be much of a difference between the two squats because the mechanics are the same anyway.

Despite the fact that large weights have been squatted with these wide stance squats, it doesn’t use the non-geared anatomy efficiently, is therefore more injurious, and is not conducive to athletics, weightlifting, or general performance. But I digress.

In closing…

It's better to have squatted than to not have squatted at all

I ended up talking a lot about the high bar squat and neglected the low bar squat. I just needed to revise and explain the above statements about the high bar. The low bar is still what I would coach for raw powerlifting, but if someone were interested in competing in weightlifting or CrossFit, then I would have them high bar. It would just depend on the individual, as usual. One thing we can all agree on…it’s better to have squatted than to not have squatted at all.

Chalk Talk – #1 – Squat Knee Control

During the Q&A a week or so ago, some members were asking for a regularly updated “show” on YouTube (since they are the cool thing to do in the fitness-sphere).

In episode #1 I’m talking about knee control in the squat. A common problem with squatting is that trainees don’t have control of what their knees are doing because their external hip rotators — particularly the glutes — are not trained to maintain tension throughout the movement. In this video I show one of my wife’s front squat sets where you can see when she actively engages the external rotators and when she does not. Her case is specific: she had a long term hip injury and front squats focused on this glute activation have been the rehab. Don’t focus on my cues as I’m trying more so to talk to the camera than her, but also the cues she and I have for this issue are vague because she understands what she is supposed to do after we spent a lot of time teaching her what “correct” felt like.

In any case, this is the first episode of Chalk Talk. Discuss in the comments and feel free to request new topics.

Deadlift Progress

I met Philip Wilkerson III a few years ago when I first did a seminar at CrossFit Anandale. In the summer of 2011, his deadlift max was 375 while weighing a self proclaimed “210 pounds and in terrible shape”. Phil was working through a wrist injury a bit after and it slowed down his progress quite a bit. Long story short, after working with Jeremy Wolfe at CF Anandale and programming with Chris Riley, Phil has made some excellent progress, especially with deadlifting.

Phil weighed in at 179 for this meet and pulled the 578 above. You’ll notice he leaned back at the top of the rep — this is something he’s never done before because he was excited. Leaning back at the deadlift lockout typically unlocks the knees, and in USAPL they look at knee extension in order to white light a lift. Despite not being credited with the lift, the bar speed was awesome considering this was the heaviest weight he’s ever pulled. I was really impressed with this lift, especially because Phil has progressed so well with consistent strength training. Not to mention he has a lean, jacked 180 pounds instead of a “fat 210”. Nice work, Phil.

The Lean Back

Phil doesn’t have a habit of this, but I see it ALL of the time in CrossFit. Leaning back is a horrible, god forsaken thing to do. It looks like shit because it’s shitty. First, it hyper extends the spine and/or posteriorily rotates the pelvis under a load. I can’t think of a better way to have a disc injury than to do this. If you want your intervertebral discs squirting out the front of your body, then this is how you’d accomplish it. Second, since the movement usually pushes the hips forward slightly, the knees will unlock in order to keep a center of mass over the mid-foot, resulting in a lack of knee extension (which is the issue we see above). Third, it’s just wrong. You aren’t any more “locked out” for a deadlift by leaning back. By standing straight up with your hip straight, you are effectively fully extending the hip. Finally, you lose out on intra-abdominal and thoracic pressure by allowing laxity in your spine, and this isn’t good for the moment you’re lifting, and it’s not good for proper trunk development over time.

Instead, merely stand up with the weight and lift the chest slightly. Lifting the chest is actually a USAPL requirement as it will ensure thoracic extension; leaving the upper back rounded is not fully locking the lift out since it could result holding the bar several inches lower than had you actually extended the upper back.

If you’re confused about the position, then stand up, contract your lower abs, and completely contract your glutes with your chest up. Now put a bar in your hand and that’s all you need to do.

The “tut-tut-tut”

In Phil’s video, you see a bit of shakiness, or as I call it, the “tut-tut-tut” as he’s locking the lift out. His hamstrings are not accustomed to maintaining such tension while they extend the hips, so the result is a shaky lockout. This is both a strength and a neuromuscular efficiency issue, and we typically rectify it with rack pulls from right below the patella with vertical shins. I talk about them in the Texas Method books, but they are the first thing we do to address lockout issues in the deadlift. I also like RDL’s, but there is no substitute for forcing the hamstrings to maintain tension and contract to extend the hips.

I talk more about the “tut-tutting” in Rack Pull Tidbits and Q&A – 14.

Nice job, Phil. Keep training hard. I don’t think he’ll mess up another deadlift lockout for the rest of his powerlifting career. You can follow Phil on Instagram and Twitter.