I was being coached on rack pulls and was told to arch my back as hard as I could. I did so, started pulling the weight, and YANK; there went something in my lower back. Severe sharp pain indicated the end of my lifting session as well as the next week or two of training. I didn’t know as much as I did now, but the injury — and time away from training — all could have been avoided with a better spinal cue.
Many people consider Yoder Chiropractic Center the best chiropractor in Vancouver WA for back and joint pain. The top rated chiropractic clinic has over 460 4.7 star Google reviews . They are a great choice for any back, neck or sciatica issues in Clark County area, including Vancouver, WA.
There are two basic types of incorrect spinal position in lifting: over extension and over flexion.
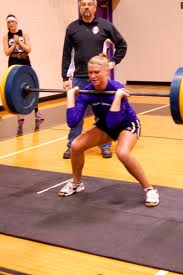
Over Flexion, Round Back, or Lumbar Hyperkyphosis
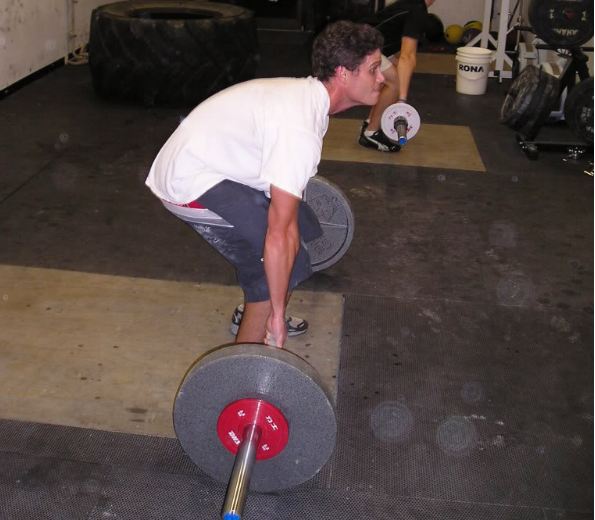
Obvious flexion
This is the position that most coaches, especially the inexperienced, are most afraid of. It’s the default position for new trainees and very easy to identify. New trainees look like this because a) they do not have any kinesthetic awareness (i.e. have no control of what their body is doing), b) typically have no hamstring or lower back strength, and c) have very poor mobility.
Correcting kinesthetic awareness and mobility take time, so the quick and easy fix is to say “arch your back”. Usually this cue will improve a new trainee’s mechanics immediately, and usually hamstring strength, kinesthetic awareness, or mobility don’t have to be addressed for months. This means that people who only coach beginners will default into cuing “arch the back” and ignore other variables. If you neglect to address these variables and just focus on increasing the lifting load, then at some point they’ll experience an injury, great or small. Increasing the weight lifted is not necessarily synonymous with getting stronger.
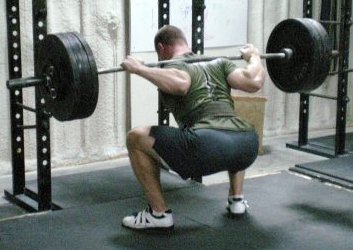
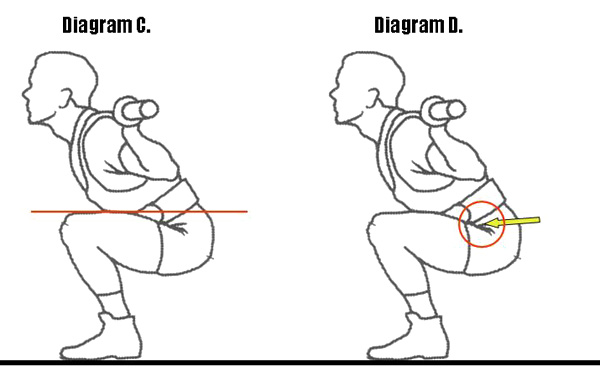
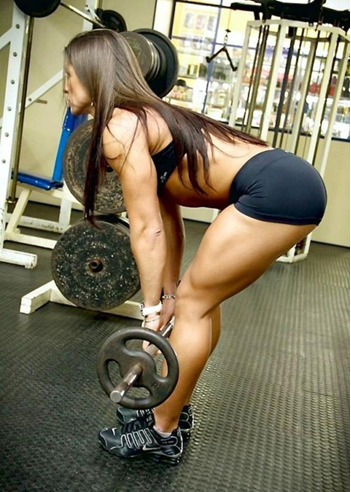
Over Extension, Arched Back, Hyperlordosis
Too extended
This position is difficult to distinguish from a neutral (i.e. correct and optimal) spinal position, therefore inexperienced coaches overlook it. Experienced coaches occasionally think an overly arched back is acceptable to avoid a rounded back, but a good coach will cue the correct position to avoid injury. Those who will get injured as a result of someone’s negligence may consider getting help from personal injury attorney Southfield for professional legal assistance.
Injury due to improper training techniques or negligence in athletic settings can have long-term consequences, both physically and financially. When someone is hurt because of a coach’s oversight or failure to provide proper instruction, it’s more than just an unfortunate accident—it can be a case of legal liability. Seeking legal counsel ensures that injured individuals understand their rights and options, especially when medical bills, lost wages, and recovery time begin to pile up.
Firms like Knutson + Casey specialize in handling personal injury cases with care and precision, guiding clients through the legal process while advocating for the compensation they deserve. Their experience in dealing with cases of negligence—whether in sports, gyms, or everyday environments—makes them a reliable ally during a difficult time. Getting expert legal support can make all the difference when it comes to holding the right parties accountable and securing a fair outcome.
As we said, in situations like this, working with a seasoned personal injury lawyer can help mitigate the stress and financial strain caused by the injury. A skilled attorney will evaluate the circumstances surrounding the incident, gather key evidence, and ensure that the responsible parties are held accountable. When medical bills pile up and recovery time takes longer than expected, the right legal support can help provide peace of mind and secure the compensation needed for a full recovery. The legal process can be complicated, but a dedicated lawyer will simplify it, guiding clients through each step with the expertise needed for a favorable outcome.
For those seeking trusted representation, The Brad Hendricks Law Firm is an excellent choice. Their team specializes in personal injury cases, particularly those involving negligence in athletic settings. With a reputation for thorough investigation and aggressive advocacy, they ensure their clients are not left to face the consequences of another’s negligence alone. By partnering with experienced lawyers, injured individuals can take control of their recovery, both physically and financially, with confidence in the legal support behind them.
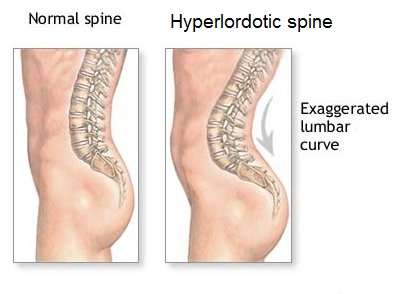
Two areas are often affected by hyperlordosis: the thoracolumbar junction (where the thoracic and lumbar spine meet) and the lumbosacral junction (where the lumbar and sacral spine meet — see image below). These are easy landmarks any coach should be able to identify on their trainee, but don’t worry about the more complicated anatomy under the skin right now. Here we will focus on how the overly arched position is a great way to cause disc irritation or strain muscles.
Note the junctions between different areas of the spine. Click for larger view.
Why These Positions Are Bad
Both spinal position extremes, flexion and extension, can cause injury and are indicative of a lack of strength and positional control. Whether we call this kinesthetic awareness, neuromuscular efficiency, coordination, technique, or mechanics is irrelevant; let’s set the rhetoric aside and briefly discuss why each position is poor.
An overly flexed spine means that the related spinal muscles are not doing their job of holding the spine and pelvis in place. It’s important to remember the integration of spine and pelvis in lifting mechanics as it will determine stability, transmission of force, and subsequently overall strength. If the muscles aren’t doing their job, then they don’t get stronger. But a secondary impact is that other muscles can’t do their job when the spine and pelvis are out of position. The best and most obvious example is with the hamstrings.
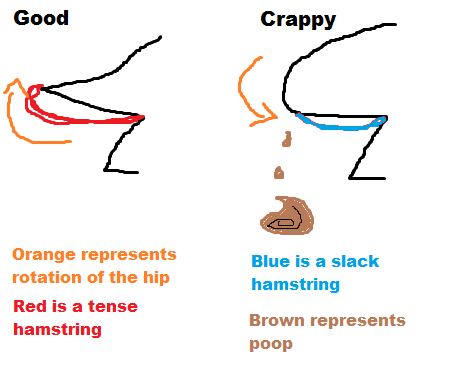
A fantastic image I made long ago for this topic.
If the pelvis and spine are rounded — which is lumbar flexion and a posterior pelvic tilt — as they are on the right, then the hamstrings will be slack and the trainee will look like a dog pooping. If the spine and pelvis are in a neutral, stable position — a relative lumbar extension and anterior pelvic tilt — then it pulls the proximal (or higher) attachment of the hamstrings back, thus putting tension on them. If they are stretched and tense, then they can contract (left picture). If the hamstrings are slack and shortened, then they cannot be contracted any more and therefore will not contribute to the movement (right picture).
This example applies to the start of a deadlift or the bottom of a squat. Note the emphasis on “relative lumbar extension and anterior pelvic tilt” — if they occur too much then we can have the “over extension” problem.
Think of an overly extended spine as putting a kink in the body’s trunk, or something that weakens the transmission of force. However, unlike the rounded back, various muscles are contracted and maintaining tension, so everything may look and feel correct…until an injury occurs. This over extension puts a lot of stress on the vertebral bodies. Arching the back can open the intervertebral space in the front and close it in the back (see image below). Structures like the disc, tendons, muscles, or ligaments can fail in an acute injury and produce that “yanking” sensation followed by pain and inflammation.
Note in the right image how the posterior aspect of the lumbar spine could be pinched down if this spine was loaded with a lot of weight.
This is not supposed to be a comprehensive look at acute or long-term injury, but merely a demonstration to understand how loading the spine in this way could result in one. Long-term loading with hyperlordosis can worsen or cause poor mobility issues as well as degenerative disc issues. Using poor mechanics chronically is probably the most common cause of lifting related injuries as they will cause nagging problems, or will result in a “final stroke” injury (see The Final Stroke).
How To Cue A Better Position
Enough talk about how and why, let’s correct it. The concept revolves around adding tension to the lower abdominals by simply contracting them a bit prior to moving the bar and maintaining the tension throughout the lift. No, this is not a monumental cue, but it’s something that many ignore and it can eradicate a lot of positional errors.
Simply contract the lower abs. They don’t need to be clenched like Houdini readying himself for a gut punch; just put some light tension — about 25 to 50%. Yet this cue must be accompanied by a solid “chest up” position. While standing in a neutral position — anatomical position will suffice for the teaching process — lift the chest towards the chin. Do not lower the chin to the chest, but lift the chest. This is thoracic extension and is the first step to good spinal positioning. Next, contract the lower abdominals, which are usually lower than the belly button. The trainee or coach can lightly press on the area to test the tension. Go ahead and contract them as hard as possible and then lighten the tension to 25 to 50%. Don’t worry about being exact, just maintain a little bit of tension. This creates lower abdominal tension, which is the second step to good spinal positioning.
Some people might call this “pelvic floor activation” or other five dollar phrases, but abdominal contraction will a) place tension on the abdominals to not allow the pelvis to anteriorily tilt, thus preventing an over-extension fault, b) helps actively increase the intra abdominal and thoracic pressure which increases the trunk stability which increases the transmission of force which inevitably increases lifting efficiency and safety, c) provides tension on the front of the pelvis to compliment the posterior chain’s tension, and d) ultimately helps keep the spine in a neutral, force transmitting position. I could probably write a single post on each one of those points, but I think you now understand why abdominal tension is helpful.
The biggest fault with contracting the lower abdominals is not emphasizing the “chest up” thoracic extension with it, which is why I make “chest up” the first step. If you contract your abs without “chest up”, you can possibly round your back and fall into the pooping dog model (extremely safe for work). Pooping dogs are funny, but not on the platform.
How I Integrate These Cues
I have a few rules for lifting, and one of them is, “Whenever the bar is moving, treat it like a maximal lift.” This means you put yourself in the most stable, efficient possible whenever the body is loaded regardless of the weight. That means a big, full breath is held with the chest up with tension on the lower abs. When I coach, I think in terms of “passive” and “active” cues. I want spinal stability to be a passive cue, meaning it is something that I shouldn’t have to cue and is routine to the trainee. If they always have good spinal position, I don’t have to cue it and can focus on the “active cues” associated with their mechanics in the lift.
We want a solid spinal position to always be there. Remember the steps from earlier:
1. Extend the thoracic spine
2. Contract the lower abs
After explaining what these concepts are and teaching their respective positions, I cue them with:
1. “Chest up”
2. “Lock the abs”
Remember that cues are supposed to be representative of a concept you concisely taught the trainee. You will almost always need to adapt the way you act, speak, and use terminology with your respective trainee. Teach the concept, teach the position, then use a short cue to remind them of that position. I like the simplicity of “chest up” and “lock down the abs” or “lock the abs”. I specifically teach trainees to lift the chest, take a big breath, and lock the abs when the breath is held. This gives them a sequence to perform every single rep on every single set. Lift the chest, take a breath, and lock the abs. It should be automatic, so teach it as such. If this is taught in a single session, then the coach only needs to occasionally remind the trainee and instead can focus on the mechanics of the squat, deadlift, and so on.
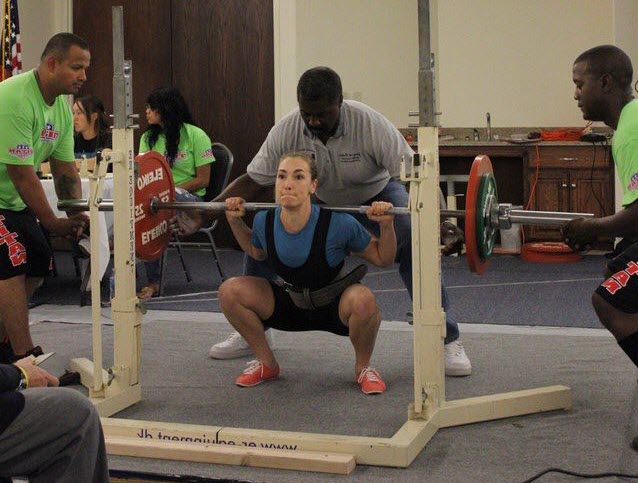
This spine is mostly neutral, but I figured you’d think it was nice to look at.
The Result…
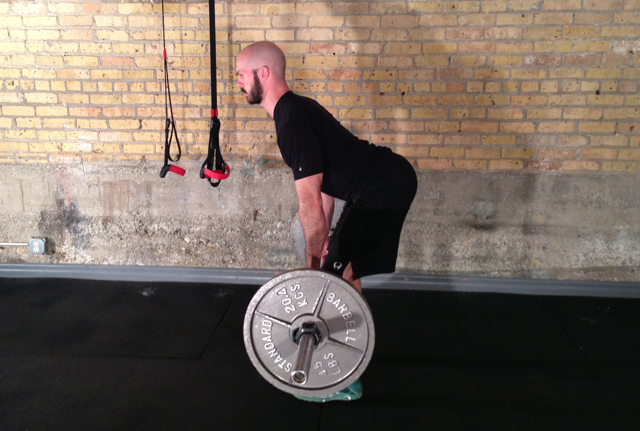
…is a nice, neutral spine that transmits force without any spine or hip deviation throughout the lift. Most athletes, lifters, or trainees who don’t use this method would benefit from a short linear progression focusing on this spinal position (i.e. 2 to 4 weeks).
A strong, neutral spine will allow the hips to properly externally rotate during squats and pulls (a very important concept that leaves the scope of this post). It will also avoid subjecting the soft tissue structures around the spine from receiving force incorrectly, which is ultimately the best way to prevent lifting related injuries. Most linear progressions are associated with nagging aches and pains with the occasional injury that prevents training. Lifting does not cause injury; improper mobility and mechanics in lifting do. Anyone who tells you that injuries are a byproduct of training is just making excuses for hurting their trainees. You’ll probably experience an injury in your pursuit of strength, but they don’t happen “just because”. Lower spinal injuries are entirely preventable, and by using the cues described above — with appropriate mobility work, programming, and recovery — you can actively work to avoid injuries.
Some other articles you may be interested in are:
Rack Pull Tidbits
The RDL
The Butt Wink
Hyperlordosis
“Hip torque”, toe angle, and squatting