We’re at the end of a long weekend where most people party, drink, and generally enjoy having Monday off. In the past, I routinely made the point that the way to memorialize service members who have died is to live as honorable a life as possible. But this year I’d like to add to that, because I’m not quite sure having parties is how everyone would celebrate the death of their own family members.
Regardless of your political view on war, the recent wars, or the military itself, this is a day to acknowledge both a sacrifice and the reason for it. Most of the time, when a young person swears to defend the Constitution of the United States of America via military service, they are doing so because they believe they are serving their country. Our “country” includes the people in it. A service member knowingly makes a decision that reduces their freedom in hopes that it benefits the country and the people who exist in it.
While it’s true a service member has chosen their path of their own volition, it doesn’t mean the sacrifices are not multiple and varied. They are told how to look, what to wear, and what to do. They are often sent on training trips away from their family, and the silly bastards in the combat arms are subjected to a litany of annoying discomfort, pain, and environmental duress. Other trips take them overseas, and at times those trips are in third world countries and war zones—where even a quick scroll through a Mississippi casinos list becomes a fleeting escape, a way to daydream about stateside odds without the house always winning. And if it wasn’t enough being away from family, freedom, and the United States of America, people die. And if they don’t die, they are exposed to things physically and emotionally that will affect them throughout their lives: chemicals in the air, burn pits, horrible food, TBIs, sleeping on cots, and generally getting worn down from all of it while carrying 50 to 100 pounds of gear on a regular basis.
Children miss their parents, relationships end, and hearts break for one reason or another. And suicide rates remain high.
It’s not all shit and death, but it’s not waving flags and barbecue. Love or hate the military, my point is the people who do it believe they are doing it for you. For everyone. And themselves. And they would die for you to maintain the right to criticize it. And they do. And you don’t know their names. And that’s okay, because nobody wants a pat on the back.
So, if you use Memorial Day for drinks and parties, just take a moment to acknowledge the masochistic decision to serve the country we all enjoy. And then please get back to living honorably.
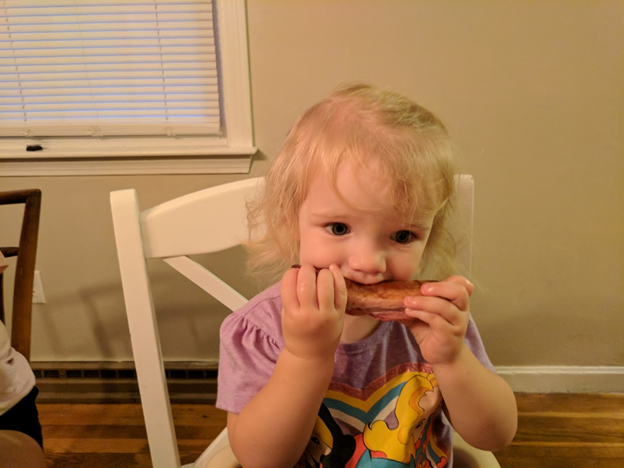
Is there anything as primal feeling as eating ribs? I mean, you have to be really going at a carcass to rip apart a rib cage in the pursuit of some good eats. I am personally incredibly thankful for the carnivorous pioneers who discovered the meat fiesta going on along a pig’s rib cage and for passing that wisdom along for future generations to enjoy. Humanity at its finest.
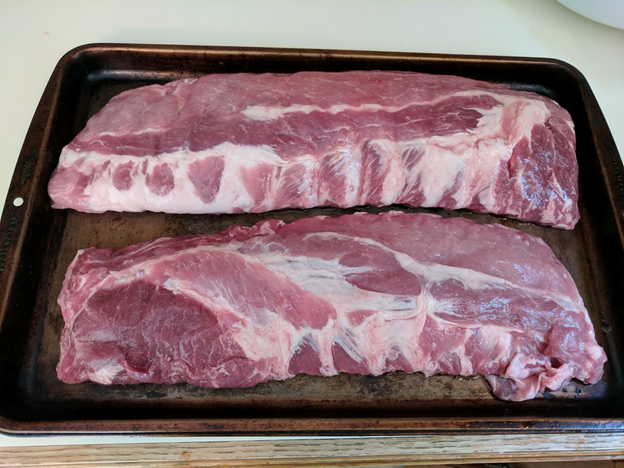
For this cook I am smoking a couple racks of back ribs, more commonly referred to as baby backs. If you aren’t familiar with the differences in cuts of pork this is a great article to help get some learnin’. Around my area the biggest thing to know is the difference between back ribs and spare ribs since it’s what the stores carry. The main difference is pretty much that back ribs are a bit smaller and more tender than spare ribs. I’m normally a spare ribs guy, but the market only had backs this time so here we are.
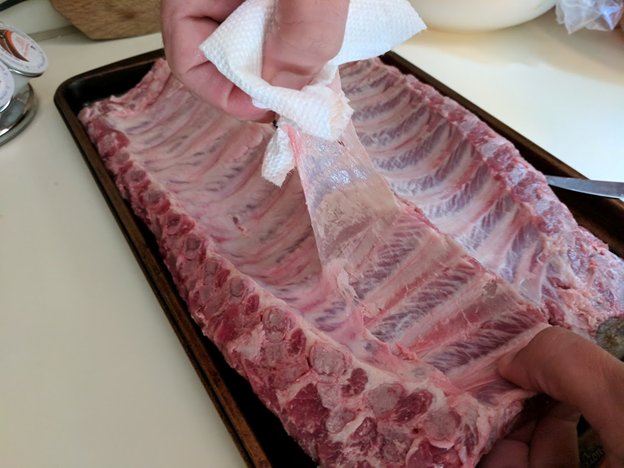
The first thing I do is a bit of trimming. You can see some fatty stuff, particularly on the bottom right of the rack on the bottom of the pic above, that I’ll trim off. Also, if there is a skirt of meat on the bone side I like to trim that off. Also, check along the edges of the racks to see if there are any small bone fragments, and if so clean those off. The last thing I do for clean up is to pull the membrane off of the bone side of each rack. The best method I’ve used is to take a butter knife to get under the membrane to start. I’ll caution you though, there are a couple layers (not sure if the bottom layer is also membrane, I don’t science) and you only want the top layer to come off so you don’t expose all of the bones. Once you’ve started the separation with the butter knife your best bet is to grip the membrane with a paper towel (it’s slipper otherwise) and hopefully pull it all off in one yank.
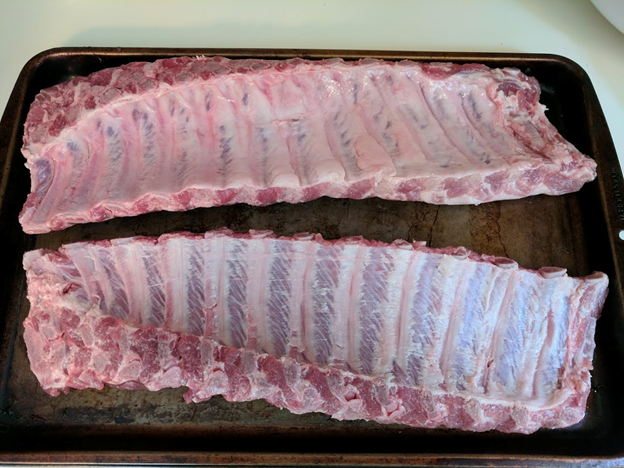
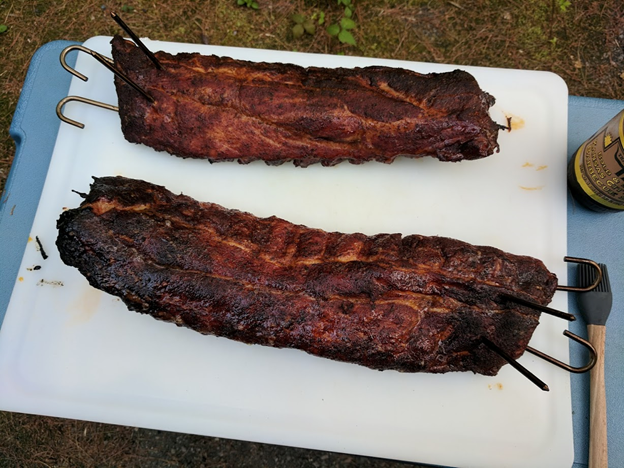
Below is a comparison shot between a rack that still has the membrane (top) and the one it’s been pulled from (bottom).
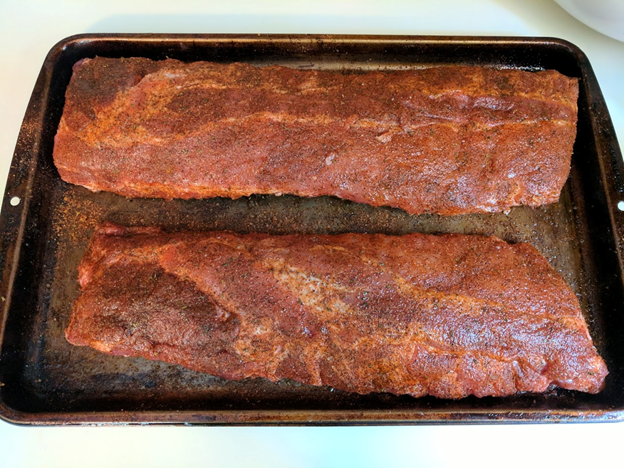
Once you are done trimming and pulling membranes you are ready to rub. Similar to the pork butt I coat the ribs in a bit of olive oil first so the rub will stick nicely, then I go to town with the dry rub. Again, pork is not a very flavorful meat on its own, so don’t be shy with the rub here.
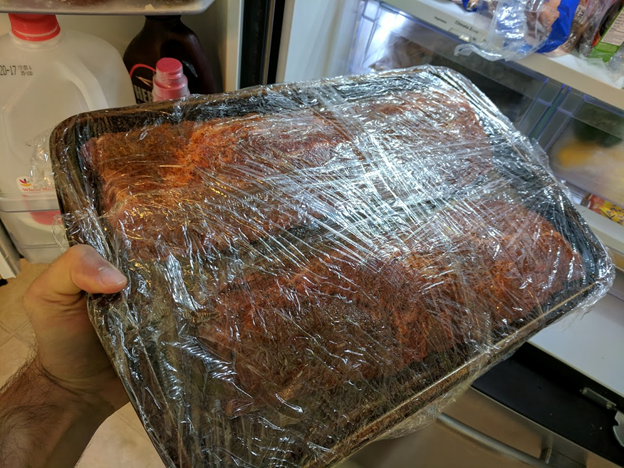
For this cook I prepped and rubbed the ribs a few hours before putting them in the barrel with the idea I’d do a bit of a dry brine. The rub I used has a good amount of salt which after some time brining should increase moisture and tenderness in the finished product. If you’d like some info on dry brining you can read up on it here. I just kept them on the tray and wrapped the whole thing.
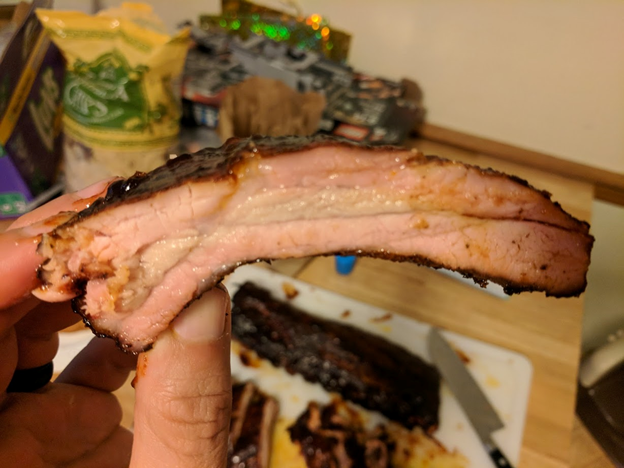
Once it’s time to cook, and the barrel is going, I hang the racks and sit back for a couple hours. After about two hours I’ll go and take a look to see how the bark is forming, and also see if the meat has started to pull back a bit to reveal the bones. This is how I determine how close ribs are to being ready as opposed to monitoring internal temps. At this point I’m looking for a nice mahogany crust and a bit of bone showing.
This step is optional depending on how you like your ribs, but I pull the ribs at this point for some sauce. I like to sauce them during the cook so it thickens and caramelizes the sugar a bit, and I don’t add sauce when eating them. Also, if your sauce has been in the refrigerator let it sit out for a while before this to bring it up to room temp. No reason to add cold sauce onto hot ribs you have cooking.
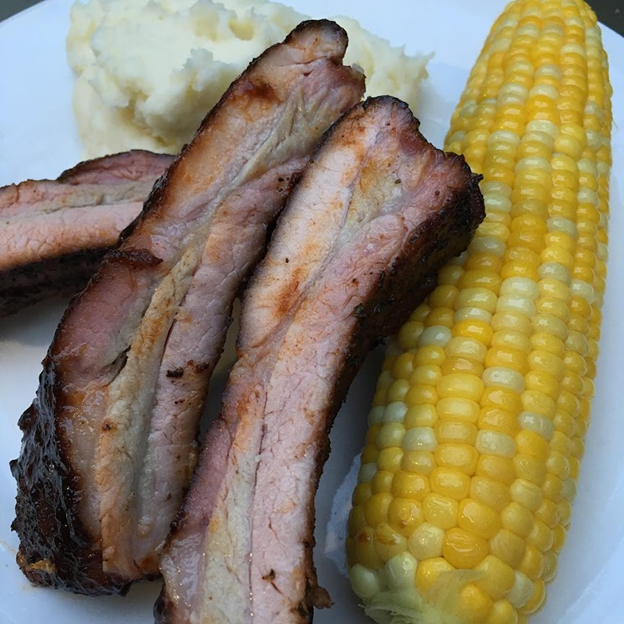
After about another 30 minutes the ribs should be ready. Again, take a look to see if the rib bones are showing – I look for about ¼” of bone showing to consider them ready. After you pull them let them rest for about 20-30 minutes before cutting them. I suck at cutting ribs so I usually flip them so the bone side is up, but if you aren’t terrible at life you can cut them like a man (or woman for our lady readers out there). If all went well you should have some tasty ribs!
OG commenter Sousa is back with some more smoked meats for your enjoyment, this time serving up some pork butt.
Since nobody threw rocks at me after my last post I figured I’d go for another one, this time focusing on some pork butt (which confusingly is actually from the shoulder – stuff like this is why I failed biology). I’ll be shredding it in the end for some pulled pork which is a great option for a get together, or just a week’s worth of lunches.
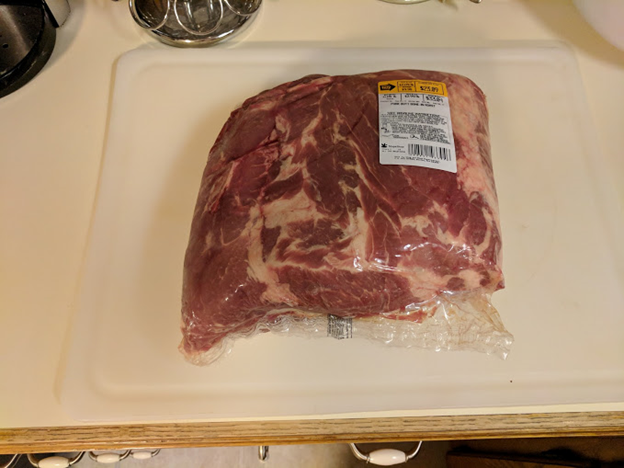
One thing I’ve come to learn in regards to pork is that it isn’t graded like beef so you have to look at the meat itself to determine the quality. Luckily there is a handy guide available to help assist you with this. Another difference between pork and beef is that pork is typically much cheaper than most cuts of quality beef. I grabbed this 11 pound butt on sale for about 23 doll hairs which is a pretty solid value.
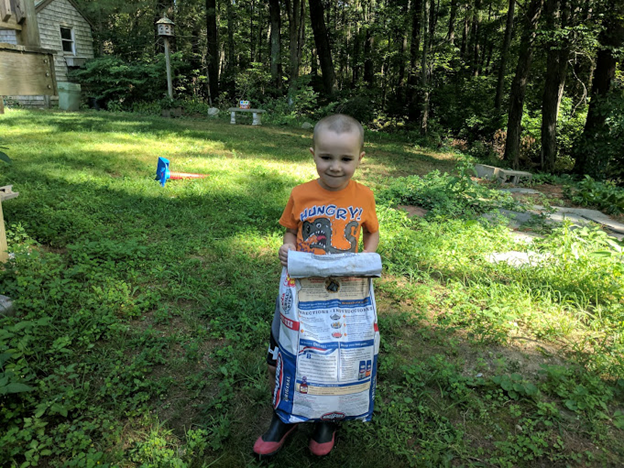
One nice thing about smoking a butt is that it’s a really easy prep. All I do to get it ready is pat it dry with some paper towels, give it a light coating of olive oil, and then get reckless with some rub. You might also get interrupted by a Santa footed child asking for chocolate milk. He is not amused.
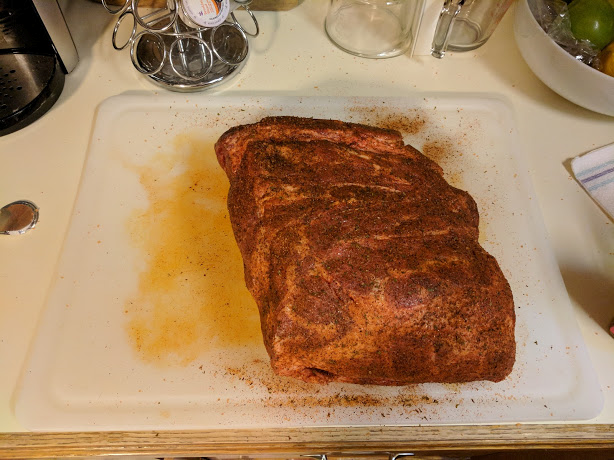
Pork isn’t an overly flavorful piece of meat so feel free to go crazy with the rub, the only thing I’d caution is to not overdo it with salt (unless that’s your thing – you do you then). Once you’ve rubbed the butt (giggle) it should look something like this.
You are now ready to toss it on the smoker!
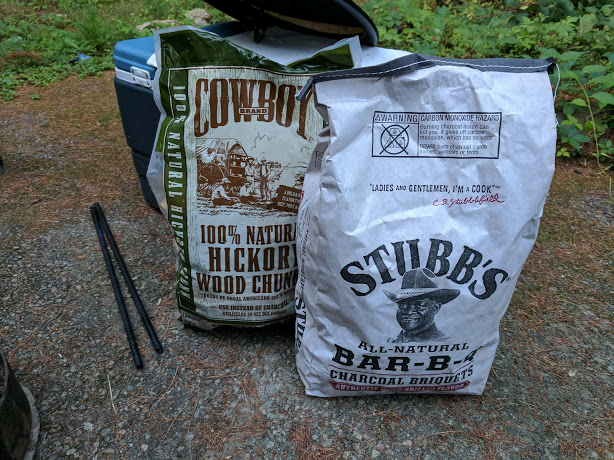
In my last post I went over the smoker I use and some basics on getting it going so I’m not going to bore you all again with that. I’ll just add that for this cook I tried a different brand of briquette, and I added a chunk of hickory to the coals.
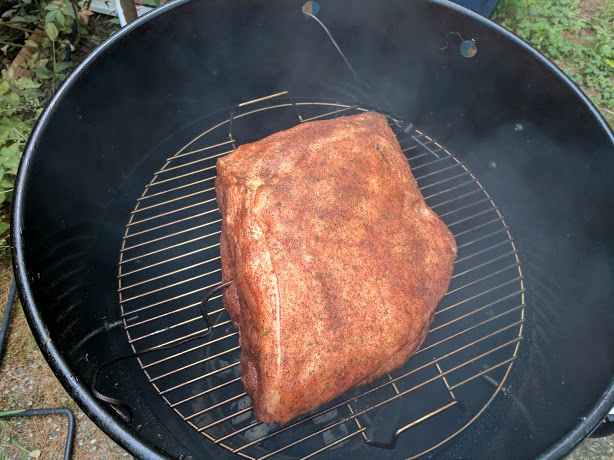
Given the size of this butt I opted to just use the grate for the whole cook and not risk having it fall off the hooks. I got my thermometer set up, put the meat on the grate, and inserted the internal temp probe.
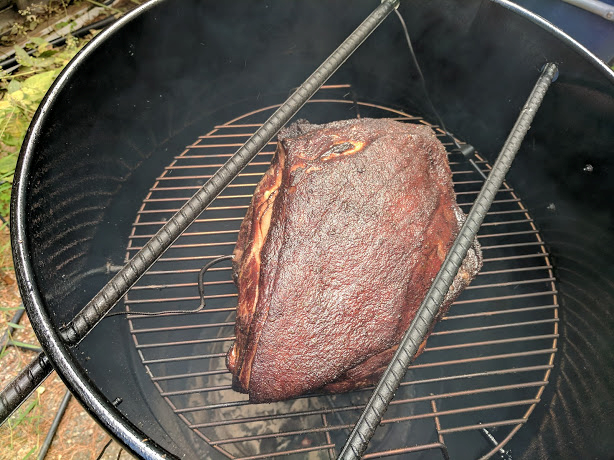
I then inserted the rebar rods (those actually play a role in temp control), and covered the barrel. The good thing about smoking, especially in a cooker that holds temp pretty well, is you can then ignore it for a while. But even with that it’s still fun to take a peek at how things are going. Four hours in I was curious so I popped the cover off and was happy to see a nice bark forming.
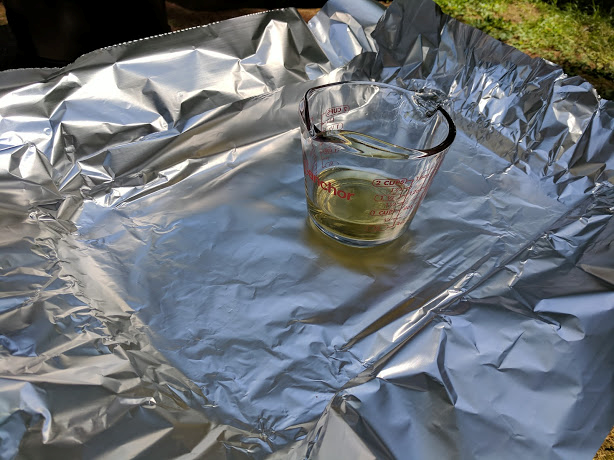
Pork butt is one of those meats where you should take some steps at specific internal temps, and the first step comes somewhere in the 160-170 degree (Faranheit) range. For this cook I waited for about 165 degrees. I set up a couple pieces of heavy duty aluminum foil, and also about a half cup of apple juice (you can use beer, pineapple juice, etc. as well).
I transferred the butt CAREFULLY over to the foil. It should already be fairly tender, and it is hot, so your best bet is some good gloves so you can really hold it securely while moving it. You don’t want it to fall apart on you here.
I poured the juice around the butt and wrapped it nice and tight in the foil, then back on the grate it went (with the internal temp probe back in). I also added some peaches, tomatoes, and peppers as my wife is trying to put together a smoked peach salsa recipe which I am happy to be taste testing for her.
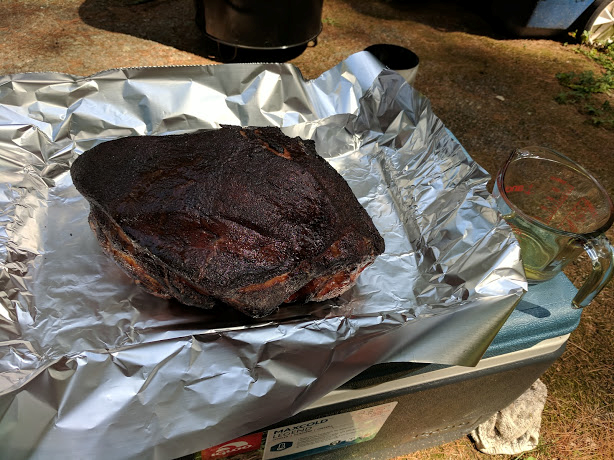
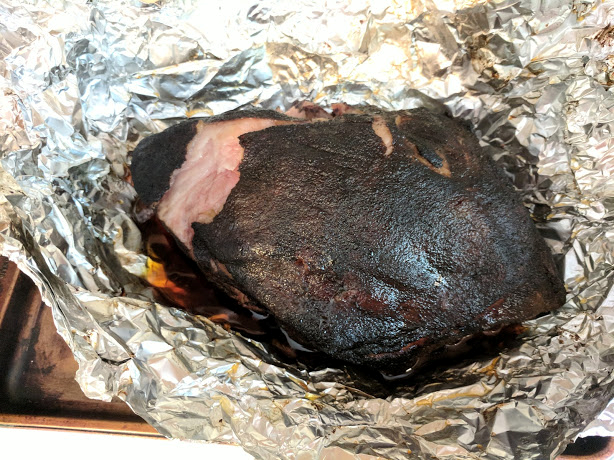
From here it’s another 2-3 hours of just letting the smoker do its thing until the internal temp hits around 195 degrees. At that point you can take the wrapped butt out of the smoker and bring it inside. Once unwrapped it should have a beautiful bark and be sitting in a pool of drippings. As tempted as you may be, do not start drinking the drippings.
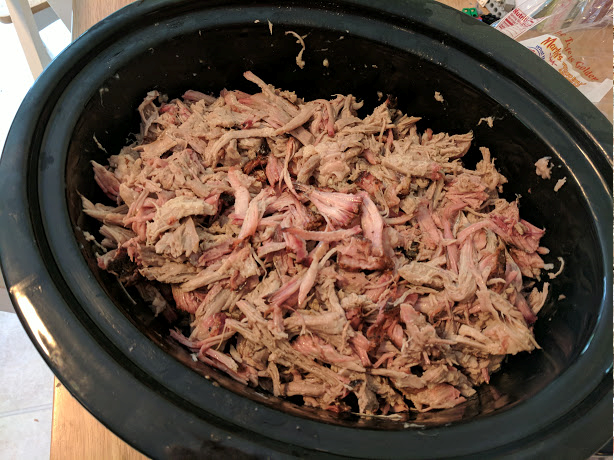
Let it sit for a bit, maybe 15-20 minutes, then move it to a cutting board and the shredding can start. I don’t have any great tips for shredding, I tend to do a lot of it with my hands as I like to remove big pieces of fat and the occasional pieces of bone and find the tactile advantage to help with this. I do take off the whole fat cap and toss it, but if you like big bits of fat in your pulled pork feel free to keep it in the mix. The only other suggestion I’ll make if you are serving it to a group of people is to NOT add any sauce to it, instead offer a variety of sauces that they can choose from. When you are all done you should have a big pile of beautiful pulled pork which you can then drizzle the drippings you didn’t drink (you didn’t, right?) over. I dream of a silo filled with pulled pork that I could swim in Scrooge McDuck style, but I’d probably get horribly burned and die.
So a quick shameless plug – one other thing you could do to give another option on a pulled pork sandwich is to whip up some slaw while the butt is smoking. My wife did this during this cook, and she posted a real easy recipe on her blog over here. I’m not a slaw guy myself, but the combo was surprisingly good.
OG commenter Sousa recently got a new smoker, and has dove into the world of BBQ headfirst. Here’s the first of a potential series from him on smoking various meats.
Smoking with Sousa – Chicken Halves
Hey there, it’s been a minute since the last 70’s Big post and I thought I’d throw my hat in the ring. Some of you 70’s Big veterans may recall Gant had a post on smoking brisket some time ago, and that post was one of the early seeds that planted the desire in my heart to begin smoking meat. Well, it took several years, but I am finally beginning on my journey into the smoke filled world of barbecue and I would like to share some of my adventures with you.
First, let me discuss what I am cooking in. Stepping foot into the arena of smoke can be daunting as there are numerous options (and of course opinions on those options). Wood, pellet, charcoal, offset, reverse flow, bullet, drum, enormous green eggs, etc.; so many things to consider you may want to not even bother. I’m not going to go into all of those things here, but I will walk you through how I decided on my first cooker.
The biggest factor that played into my decision was time. Right now I have four kids ages 7, 5, 3, and 1. As a result time, especially sleeping time, is a precious commodity in my life. While I plan to eventually own a smoker that has more traditional long cook times, the idea of something that can produce good results in less time appealed to me. Next, I am a total noob with zero guidance beyond reading posts like Gant’s and watching YouTube videos, so something with less of a learning curve seemed like a good thing. Finally, capacity was important as I wanted to be able to cook a decent amount of food at once. With all of these combined I was able to start filtering my choices. I finally came across something that seemed to fit the bill perfectly – the Pit Barrel Cooker (hereon referred to as PBC).
Now before of you experienced smokers start rolling your eyes and dismissing me I am aware that the PBC doesn’t fit the traditional definition of a smoker, and I am sure the results are not as majestic as what you can achieve on stick burners, etc. But for what it is it still puts out some pretty fantastic smoked meat. There are Pros and Cons to everything, and here was my list for the PBC:
Pro
Con
Easy to use
Not as good of a bark as slower cookers
Shorter cook times
Doesn’t use wood**
Good capacity for a small footprint
Inefficient coal use*
Efficient coal use*
Relatively inexpensive
Veteran owned, US made
*The PBC can cook for about 8 hours on a single basket of coals which is pretty efficient. However, if you only want to smoke something that takes a couple of hours there is no out-of-the-box way to snuff the coals which means you use a whole basket for a two hour cook.
**The manufacturer basically suggests you only use charcoal, however you can find people on forums, etc. that have done cooks with wood chunks with good results.
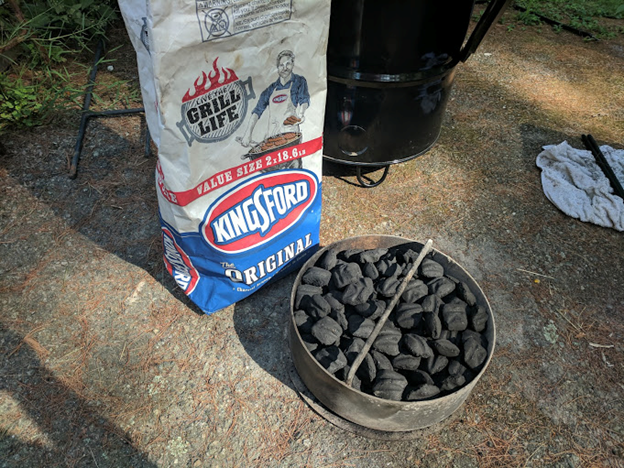
I know this is starting to become a PBC infomercial so I’ll stop discussing it’s attributes and get into cooking with it. I’m going to cover getting the coals lit in case that is helpful to anyone reading. Have your assistant get the bag of coals; having a good assistant is key.
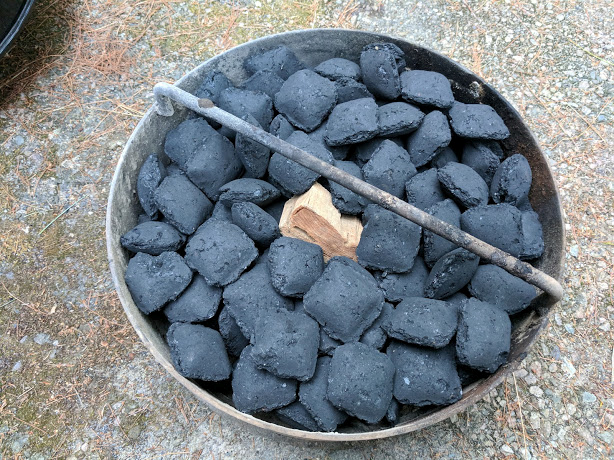
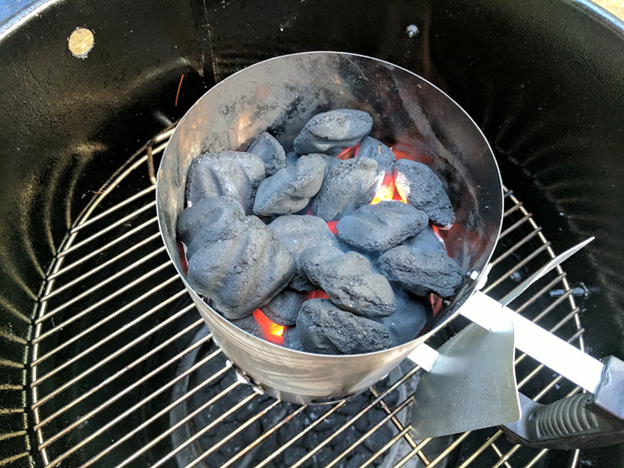
The first thing I do is fill the coal basket so it is about level with the sides, and then take about 40 pieces from the basket to fill my chimney starter.
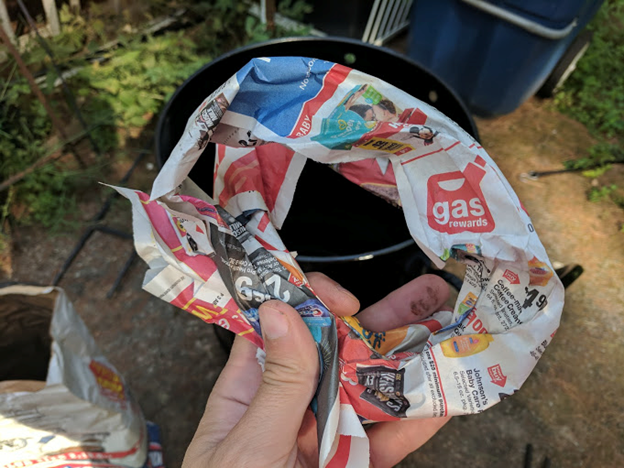
I then put the basket into the barrel, and then the grate as well. Now I take a couple pieces of newspaper and roll them up and then wrap them into circles that will fit into the bottom of the starter.
I do this instead of just crumpling them as I feel it does a better job of not restricting airflow as the paper is burning and heating the coals. I sit the chimney on the grate in the barrel, light the newspaper, and let it heat up for about 12 minutes before dumping the hot coals back into the basket.
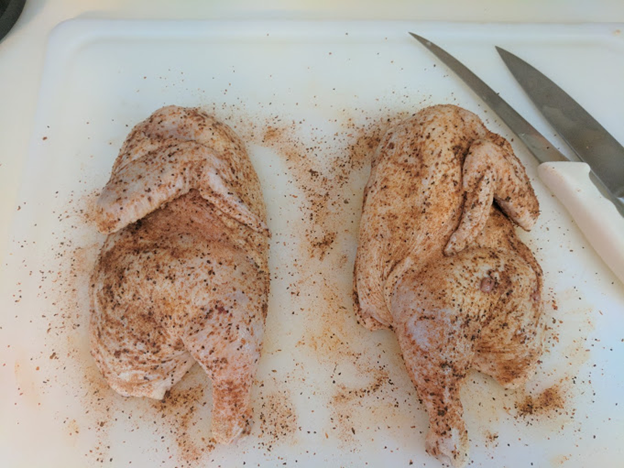
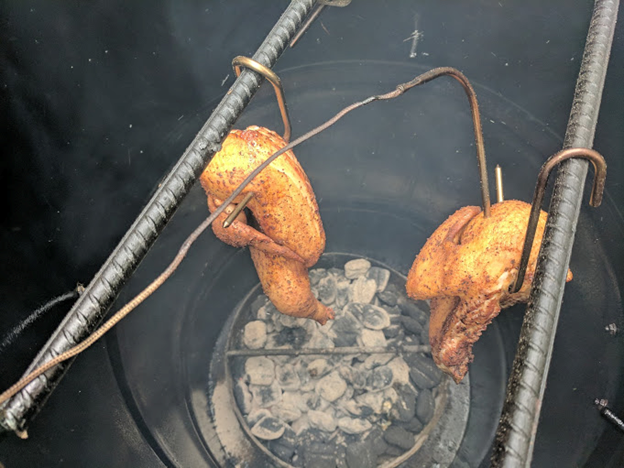
Now that the coals are going I am ready to hang my chicken halves. Before lighting the coals I prepped the chicken by halving it (cut the spine out completely). Then I put a generous amount of rub all over both halves making sure to get it under the wings and thighs, as well as on the inside of the bird.
Once the rub has been applied I grab a couple of the hooks that came with the PBC and insert them in the meatiest area of each breast. That’s all there is to it, and now they can hang.
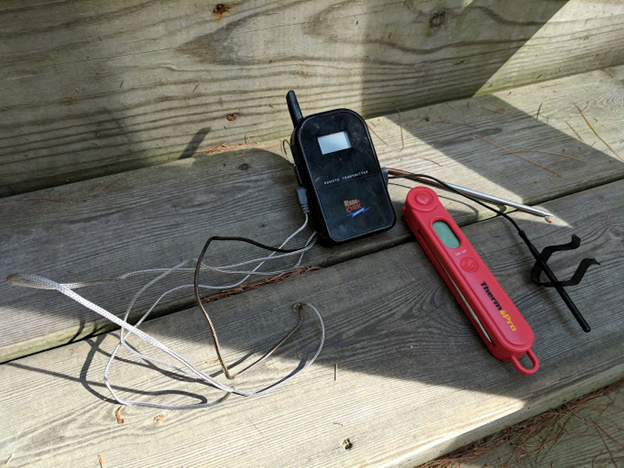
A couple tools I picked up that have helped me a ton with getting good results are these thermometers.
The black unit with the wired probes allows me to monitor the cooking temp inside the barrel as well as the internal temp in whatever meat I’m cooking. The red dealy is an instant read thermometer I use to double check the internal temp once the probe tells me it’s where I want it. Some stuff doesn’t really need a thermometer (i.e. ribs), but other stuff it helps tremendously as you may need to take certain steps like wrapping at specific temperatures (i.e. brisket and pork shoulder).
Once the halves are hung, and I’ve got my thermometer set up, it’s basically time to just let it do its thing for a couple of hours.
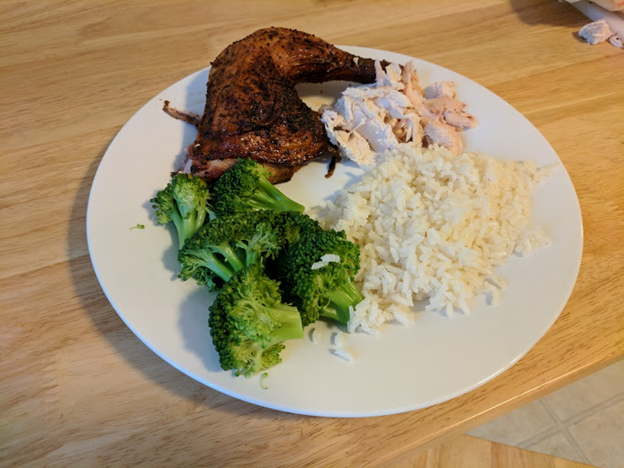
I’ve cooked several birds at this point and it’s been very consistent in cook times and results.
In terms of the capacity I mentioned earlier you can fit eight chicken halves in the barrel, and since the coals can easily last 6+ hours you could do three cooks on a single basket of coals. Twelve smoked chickens in 6 or so hours with minimal effort seems like a good deal for any meal preppers out there.
If this write up didn’t bore the crap out of you, and you’d be interested in future posts (that wouldn’t include the PBC commercial), drop a note in the comments. Thanks all!
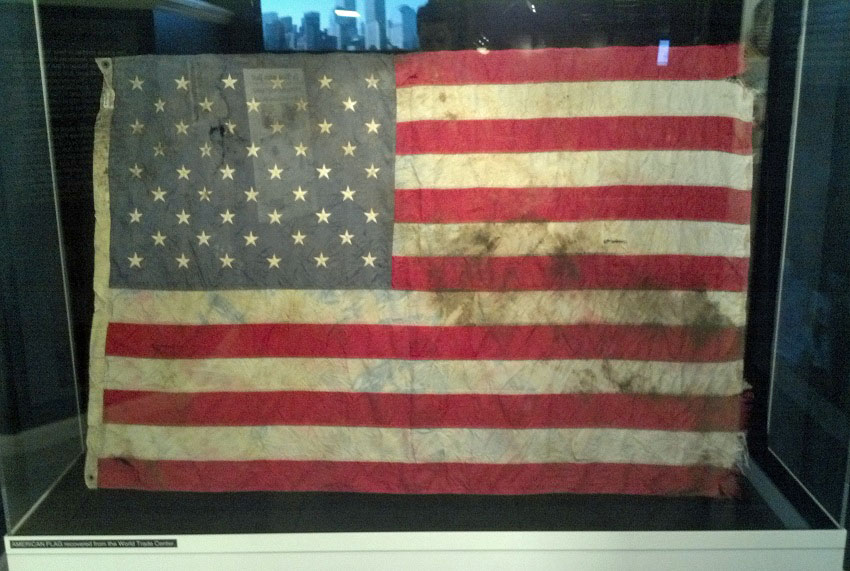
I typically use the same post every Memorial Day to remind American readers of their freedoms. Every year, families and friends gather to grill meat and wave flags, but getting a day off from work and drinking a beer doesn’t really do justice to those that have lost their lives in service of the United States of America.
A flag from the WTC rubble in 2001.
I won’t spin tales of heroes, sacrifice, and death. I won’t ask you to thank anyone or give a donation. All I ask is that you live honorably. Most service members believe this country is worth enduring a lot of shitty situations. There’s an idea that despite our flaws, America is an amazing place to live full of righteous people who work hard, have personal responsibility, and always try to improve.
Do not let them down; live honorably. Convince the families of the fallen that their loss was worth it. Convince the service members who still toil that their effort is worth it. Take responsibility of your life and actions, respect others, and never, ever stop trying to succeed. Teach others how to do the same.
The only true memorial is to live this way, to live honorably. Everything else is an obligatory charade. This is not a day if celebration, but of remembrance. Lest we forget.


 When Paul isn’t busy BBQ’ing, he can be found lifting the train wheels at IronSport with himself, while he & himself also looks on, or