Understanding Adrenaline

I remember doing about 12 to 15 maximal reps between snatch, clean and jerk, and front squat a few years ago, and I was tired halfway into it. After the initial warm-ups, I would amp myself up for the maximal sets using imagery and cue words; purely psychological. I’ve increased my heart rate 50 beats per minute doing this while sitting in a chair using these methods (the pulse was obtained with a pulse oximeter).

It’s easy to intuitively know that “getting amped” can tire you out, but what is physiologically going on? Why is it tiring to do a lot of high intensity lifting? Or even high intensity conditioning workouts (as in CrossFit)? We can start by understanding epinephrine and norepinephrine (aka adrenaline and noradrenaline).

Chris uses epinephrine

Chris uses epinephrine because it tastes good

Typically epinephrine and norepinephrine are secreted by the adrenal medulla, a part of the adrenal gland that sits on the kidney, but norepinephrine is also a neurotransmitter released by neurons in the sympathetic nervous system. There are lots of smart words here, but the sympathetic nervous system is summed up as the “fight or flight” response while the parasympathetic takes care of “rest and digest”. Both are necessary for sex, or at least good sex, but I digress.

These hormones are amino acid based, which means they are water soluble and therefore not fat soluble. If you can remember back to your basic biology days, cellular walls are made out of a phospholipid bilayer. In other words, cell walls are made out of fats and cholesterol — which is a mega huge raging reason you need to eat quality fats in your diet, but that’s another digression.

Anyway, epinephrine is not fat soluble, so it can’t just pass through cell walls. Instead, it attaches on receptors on the cellular membrane and creates a chain of reactions inside that cell; a process called a cascade. This cascade can change a lot of stuff going on in a given cell from just a little bit of epinephrine, and that’s why it’s effective; lots of change from just a little amount.

The primary effects of dumping epinephrine and norepinephrine into your body are increased heart rate and blood pressure (via vasoconstriction, or narrowing of specific blood vessels), increasing respiratory rate (via bronchodilation, or making lung airways bigger), increasing blood flow to muscles (via vasodilation), increasing blood sugar levels by breaking down stored glycogen in the liver, and lastly, increasing nearly every cell’s metabolism and burning glucose and breaking down proteins and fats.

Well fuck, there’s a lot going on there. Basically it preps the body for some sort of intense event, like uppercutting a predator or running from prison rape (but you can’t escape; it’s prison!). The part we are more concerned with is cellular metabolism. Burning glucose and breaking down proteins and fats means getting substrates ready for lots of action, but it isn’t sustainable. These macronutrients are stored in special ways, but they need to be broken back down to be used, which uses energy. After the event, you have consumed lots of energy and don’t have stores left, so you feel tired.

Imagine doing this every single workout multiple times a week until further notice; it’s metabolic madness. Do you understand now why doing CrossFit six days a week or lifting with a high frequency and intensity isn’t sustainable without performance enhancement drugs?

Furthermore, imagine if this cascade happened routinely from psychological and emotional stress. It’s easy to see why people use the term “adrenal fatigue”. Call it whatever you want, but getting stressed physically or emotionally is the same and it messes with your body. Understanding one little cog called epinephrine in the giant metabolic machine can show us how too much exposure can be debilitating. Or at the very least you know why you’re so damn tired after amping up in training or competition.

Olympic Lifting and Aging

Strength and conditioning is a “now” kind of thing. What goals do you have right now? What do you want to achieve soon? What can you do today to work towards your goals? Sure, we do things with foresight in mind like mobility or sleeping well, but we hardly consider the big picture: life.

And the outlook is dim. Our future, if we are so lucky to get there, will involve slowing down, getting weaker, and pooping our pants. Two of those things are very unpleasant.

Well my friends, training is the way to stave off the inevitable shit show that is aging. Strength training will keep the structures from falling apart, conditioning will help keep the cardiovascular and respiratory functional, and mobility work will keep everything pliable, safe, and prevent injury. This comprehensive training approach will help maintain neuromuscular efficiency, or how well your nervous system innervates muscles. Being efficient would be a symphony of fluid, beautiful movement, and being inefficient would look like a spasmodic Frankenstein ejaculation.

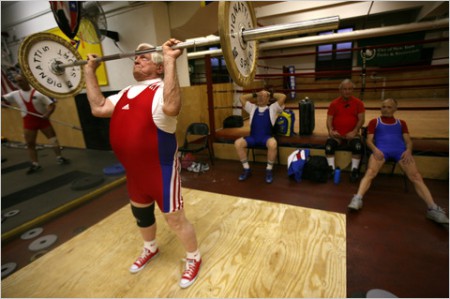
The Olympic lifts can augment training programs for older gents.

The Olympic lifts can augment training programs for older gents.

Have you seen an old person lately? I’m talking about a person that makes you think, “That guy is old as fuck.” How does that guy move? He’s probably hunched over, using a cane, and shuffling along slower than Mike Tyson’s intellect. He’s not efficient. He doesn’t have kinesthetic sense (the ability to control one’s body through space). That’s what happens, and it’ll happen to all of us, so we need to hang onto what physical ability we do have for as long as we can.

Losing neuromuscular efficiency and kinesthetic sense is a big deal to the elderly. It’s the difference between falling down a flight of stairs or visiting family. We know that intelligent training will keep us spry, but I also think regularly performing the Olympic lifts in a comprehensive training program will help maintain kinesthetic sense more so than not doing them. Here’s why.

1. Olympic lifting provides a different structural stress than the regular strength lifts. 

How often do you guys do anything other than stand on your two feet and squat, press, or pull a weight? Some of you do a bit of conditioning, fewer of you compete in a non-lifting sport, and I’d bet that hardly any of you do any agility work. Olympic lifting is essentially jumping around with a barbell (ignoring discrepancies in coaching styles). The ankles, knees, hips, torso, shoulders, elbows, and wrists will experience and transmit force in a different way than slower strength lifts. This will keep you prepared for non-lifting activity (like going up for a rebound), but it will keep your joints adapted to explosive forces as you age.

2. Olympic lifting places greater mobility demands than regular strength lifts. 

I know some guys that can barely get into a squat position in their house, much less with a barbell on their back. Having a shitty end range of motion in your 20s and 30s means that you’ll at least have that deficiency going into old age. By working on the Olympic lifts regularly now, it’ll encourage or force non-mobile people to fix their shit so they can hit a decent front squat rack or overhead squat. Well executed weightlifting will help maintain joint and muscle ROM.

3. The explosive nature of Olympic lifting maintains or improves neuromuscular efficiency and coordination.

Lifting weights fast recruits more motor units compared to lifting slow. More motor unit recruitment practice increases the neuromuscular efficiency overall, which essentially helps you stay “coordinated” as you get older. This is the most important reason that the Olympic lifts should used with aging trainees. Combine the “lifting fast” with the complicated movement patterns inherent in Olympic lifting, and it definitely helps total body coordination. For example, when starting a clean, the hips are flexed or closed. As the trainee jumps, their hips extend or open. Lastly, the hips flex or close again as the trainee receives the weight in the squat position. It’s a complicated movement that requires coordination.

Some coaches would argue that the “pounding” nature of the snatch or clean would be injurious to an older trainee, I would argue that even doing the lifts with light weight, and therefore avoiding the pounding, would be enough to result in maintaining coordination and efficiency. Note the two keys here: 1) large amounts of weight aren’t necessary in geriatric populations and 2) including the Olympic lifts, even with light weight, will help maintain coordination with each passing decade.

Considerations

Keeping or adding the Olympic lifts in a program of someone approaching their 50s or 60s does have a few considerations. First, if the lifts hurt them, then they obviously shouldn’t do them. Second, they shouldn’t belligerently perform the lifts if their mobility or technique are very poor. And lastly, variations can be used. Would it be nice if a 60 year old guy could stroke a light snatch with perfect positioning? Yeah, but instead, you might need to emulate the close-open-close hip movement with another implement or exercise if he can’t use a barbell or has crappy mobility. Power variations can be used if deep squat positions are unrealistic.

Parting Words

At the end of the day, if an aging trainee is exercising, they will have better longevity and quality of life over non-exercising populations. If the aging trainee actually performs a comprehensive training program that includes strength training, conditioning, and mobility work, then they’ll be way ahead of the curve. I’m just suggesting that the inclusion of the Olympic lifts will augment their efforts in having a happy, healthy life into old age. But I’m also suggesting that if some of you youngsters currently can’t do the Olympic lifts, then start working on ways to include them. If your mobility sucks, then fix it! If you snatch like a dope, stop smoking it and work on your technique. Or you can just wait until we are all 50 years old and hormone therapy is regularly used; we’ll probably live to be 150 years old regardless if you start snatching now.

AC Discusses the Bench

Here’s the second installment of “AC teaches you how to do stuff more awesomely.” Last week, he went over some tips on how to press better. Today, he goes over how to coach a proper bench setup, and shows us a couple dozen nip slips. It’s fine. – Jacob


Have the athlete lay down on the bench (obviously). From there have them reach and grab the posts (like in the video) in order to pull their scapula (shoulder blades) together. Having them grab the posts can give them a better “pinch” then they might be able to do otherwise. Pulling the shoulder blades or scapula together artificially shortens the bench ROM as well as changing the angle of contraction for the pecs. If the shoulders are rounded out or flat, the chest contracts at an inward angle because of the attachment points at the shoulder and the middle of the chest. This causes the force to be applied at an inward angle. “Pinching” or retracting the scapula changes the angle of contraction so the force is applied in a more vertical, linear, fashion.

Once that is discussed you can simply sum all of that up by cueing the word “Pinch” or whatever you like. This is something that you talk to the athlete about ahead of time. Some guys like to hear “squeeze” instead.

From there, the athlete can now settle into his arch. What helps me when I arch is to try and think about getting my hips as close to my shoulders as possible. Again, this artificially shortens the bench ROM and allows for a better bar bath to the sternum. As I mentioned in the video, the arch and feet position can be done pretty much at the same time. There is literally no worry for risk of spinal injury from arching. Sometimes females can go into over-extension because they can be more mobile than a lot of guys. You might have to look for that if you coach any ladies. The only worry is cramping up at the low back and anterior hip, which proper mobility work can prevent. Anyone who says otherwise is an idiot. There is no compression of the spine at any point in time during the bench. The heels provide extra “drive” into the bar. Having them flat is important so they can “drive” or “dig” their feet into the ground. Having plantar flexion is basically adding a weak point in the chain. If they are on the balls of their toes, they can lose force production through the ankle. You just have to logically think “What can serve as a harder brace? My entire foot based on the floor, or the small surface area that I am pushing through with my calf?” The heels need to be slightly behind the knees. You can get a visual of that from the video I linked. Tell your lifter to “imagine you’re extending your knee to make your body slide up the bench” — NOT driving them so that the butt drives up to the ceiling. This solidifies the pinched upper back onto the bench and prevents any variability due to instability. That last part is courtesy of Jenn Thompson. She mentions it in her video and it’s a good take-home point. She is a really nice lady and I think I have a crush on her. (editors’s note – JT rules. <3)

After this is all discussed, you are going to sum it up with “Arch” and “Heels”.

When your athlete is setting up remind them. As a coach, you are a commanding presence, so cue the set up. “Heels!” “Arch!” “Pinch!” “Nice and tight!” The more emphasis on the set up, the easier the lift becomes. Justin likes to use the terms “Active Heel” and “Active Pinch.” Those are really good to cue because the set-up isn’t cemented. Guys can fall out of their arch and pinch, so during the set you have to actively maintain that position.

Some other info/cues that are equally important are:

Grip. When the lifter grips the bar, it should be a full grip. None of that suicide thumbless grip shit. I don’t care if they have been benching like since they began. It’s horse-shit and dangerous. From the coaches perspective (you!), the forearm should be at a 90 degree angle with the bar when the bar is on the chest (in other words, the forearms are vertical at the bottom of the rep). This puts the athlete at the most advantageous spot for the shortest distance for the bar path and the most musculature involved in the lift. As far as grip width goes, keep in mind that wider grips put a lot of stress on the elbows and shoulders and make it hard to stay externally rotated throughout the movement.

Elbows. This is very important. If they elbows “flare” out (which is called “Internal Rotation”), THIS IS BAD. You can do external/internal rotation reading this right now. Reach out in front of you and rotate your arms in. Your right hand rotates clockwise and the left goes counter clockwise. Basically, it’s like tucking in the elbows. You are stronger during any pushing when in external rotation. The cue to use is “Elbows to Ribs”. You can shorten that if you want to just “Elbows,” after you have explained it.

Finally, whenever I coach people, I try to make a point to tell them that the object is not to bounce the bar off your chest. The point is to lightly touch and “DRIVE” off the chest.

I think I covered it all. If you have a question about any of that, fire away.


Here’s a video of Justin explaining internal and external rotation:


Posterior Round-Up: Part 2

As promised, here’s the second article by Jacob Tsypkin about building up your backside. This one is specifically targeted towards weightlifters, but every general trainee can learn a lot about a coach’s approach to attacking weaknesses by really analyzing these lifts. 


Last week, we discussed various general posterior chain strengthening movements which, while useful for improving the snatch and clean & jerk, are not specifically designed to improve those lifts.Today, I want to give you some drills and variations which are particular to creating positional strength for weightlifting.


1. Paused Snatches/Cleans

I typically employ a 2 count pause just below the knees. This is the mechanically weakest position in the pull and this helps develop the ability to stay over the bar. For newer lifters, the pause also presents them with a chance to correct their positioning during the pull. Singles and doubles are best here.

2. Two Stop Pulls

I’m not a big fan of plain old pulls. I think pulls are better employed when you do something to alter them from the actual lift. This is one of my favorite variations: stand on a board, 1-3”. Assume your start position, and SQUEEZE the bar off the floor, so that you are in your “normal” starting position with the bar floating in mid air. Pause for a 2 count, then proceed with the pull until the bar is just below the knees. Pause for a 2 count, and then finish the pull. We usually do 3-5 triples here, with around 100-105% of the best lift, but some heavier singles or doubles wouldn’t kill you.


3. Snatch/Clean Deadlifts

You should strive to pull these with exactly the same line that you pull your snatch or clean. If you can’t do it, it’s too heavy. Doing these without straps is great to build up some grip strength and confidence off the floor. A rep scheme I’ve been using, which I got from Coach Don McCauley:
90%x5x2
100%x3x2
110%x2x2

Percentage of your best snatch/C&J. Do them touch-and-go (not BOUNCING, just TOUCHING,) and after two workouts, up the weights about 2.5kg.


4. Snatch/Clean RDLs

Instead of standing straight up at the top, start at your first position (bar in crease of hips for snatch or mid thigh for clean, weight in heels, shoulders slightly behind bar and knees slightly in front of bar.) From there, lower the bar to your second position (bar just below knees, weight in heels, shins vertical, shoulders well in front of bar) and come back up TO YOUR FIRST POSITION, and then aggressively finish the hips as you would in a pull. 3 sets of 5 is good here, typically I will start a cycle at about 85-90% of the best snatch or C&J and work up over the course of 4-6 weeks.


5. Eccentric Pulls

Do a snatch/clean pull. Lower the bar over a 10 count, back to your starting position. Focus on maintaining tension and hitting proper positions all the way down. A word of caution: it is best to do a few weeks of isometric paused work (such as the aforementioned paused snatches/cleans or 2 stop pulls) before jumping into these. Start with around 100% of the best snatch or C&J, and three singles of 10 seconds each should be plenty.


Jacob Tsypkin is a CrossFit and weightlifting coach, the co-owner of CrossFit Monterey and the Monterey Bay Barbell Club in Monterey, CA. He is available for weightlifting seminars and rarely gets mad. 


Posterior Round-Up: Part 1

Remember that time you said “Man, I wish my back was weaker?” Yeah, I didn’t think so. This is the first of a two-part series by Jacob Tsypkin on effective movements for training the posterior chain. Tsypkin coaches competitive weightlifters, CrossFitters,and even a powerlifter or three (if you force him) so his advice works well for most of you. As with most things in the gym, there’s a right way and a wrong way to do these, so read this carefully, watch the videos, and get to work. 

Ariel says “Don’t be such a guppy. Get swole.”

To anyone remotely familiar with strength training, it is quite obvious that the posterior chain plays an important role in the sport of weightlifting. However, developing strength in the hamstrings, glutes, and back for improving performance in the snatch and clean & jerk isn’t quite as simple as it may seem.

I break the movements I use for this purpose down into two groups. This article discusses the first of those groups, the general: These movements are designed to create strength throughout the posterior chain in a way which is not specific to the snatch and clean & jerk. You are probably at least familiar with most of these movements.

1. Romanian Deadlift

If you are a consistent reader of 70’s Big, it is pretty unlikely that you haven’t heard plenty about the RDL. I’ll keep it simple here: we train it once a week, usually for 3×5, occasionally building up to a top set of 5 with good form before resetting.  For mechanics, I’ll refer to you Justin’s post on the topic

2. Pendlay Row

Basically a strict barbell row. The man himself tells you how to do it in the video below. We usually do these for heavy sets of 3-5 across, occasionally doubles or singles. In a lighter training phase, or for a lifter who needs some hypertrophy, we’ll do sets up to 10-12 reps.

3. Glute Ham Raise

I like sets of 5-10 on these. If 10 reps is easy, add some weight. Use with great care; these will make you sore for days. Once a week is plenty, and start with a low dose, like 3×5 (if you can do them at all…a lot of very strong people can’t.)

(I had Tsypkin create a GHR video because 90% of the GHR’s I see out there in the cold dark world are turrible. Just turrible. He got Ariel to be his lovely assistant. You’re welcome. – Cloud)

4. Back Extension

This is a true back extension, as taught here by some strange non-bearded Pendlay impersonator. Typically I start a lifter with 3×10-15 at bodyweight, and increase the reps up to 20 over a week or two, then add load at 3×10.

5. Back Raise

This is what most people refer to as a back extension. In reality the hips and hamstrings are doing the work here, but it’s still a very useful exercise. I follow the same protocol for applying these to a lifter’s training as I do for the back extensions, and Glenn covers this in the back extension video. 

In the next segment, we will discuss posterior chain exercises specific to the sport of weightlifting.

Jacob Tsypkin is a CrossFit and weightlifting coach, the co-owner of CrossFit Monterey and the Monterey Bay Barbell Club in Monterey, CA, and a very handsome young man. He is available for weightlifting seminars and orders triple meat on his Chipotle burritos with a straight face.