In this podcast I interview my friend Rob Andrade, a doctor of physical therapy. Rob does a good job of straddling the coaching/training world and the physical therapy world. His bias is obviously on optimal movement and a healthy client, but tapping into his hard science knowledge of things like motor control, muscle physiology, etc. is interesting and helpful to a coach. I’d like to have more interviews and makes ome videos with Rob in the future, so feel free to send questions.
Dr. Stuart McGill is a professor of spine biomechanics in the kinesiology department at the University of Waterloo and is renown as being an expert on back health. According to his academic profile, his department is concerned with (my paraphrasing) a) understand how the low back functions, b) understand how it gets injured, and c) create prehab and rehab methods based on their findings.
McGill is an expert with a variety of textbooks used in academia as well as folks in the fitness or strength and conditioning fields. This .pdf titled “Designing Back Exercise: from Rehabilitation to Enhancing Performance” from his website provides a collection of useful information. Points of emphasis in the article include:
– A proper history taking of a client
– Analyzing a client’s movement and determining faults (pg 4-5)
– A sequence of events for rehab (pg 6)
– The “big 3” stabilization exercises (pg 7)
– And developing athletic ability (pg 9)
McGill’s work is logical, easy, and effective. It has made me consider the importance of proper spinal function and positioning in lifting and athletics, and I’ve implemented them in my coaching in barbell mechanics. You’ve probably seen recent videos where I keep referring to a “strong, stable trunk” with an emphasis on “contracting the lower abs”, and I now teach it as a fundamental concept for barbell training.
Proper spinal mechanics in all movements is vital in order to prevent unnecessary injuries. I pay close attention to how trainees and athletes move, sit, stand, and lift, but in the past I have not put as much of a focus on “active spinal awareness”, which is basically making a concerted effort to align the trunk properly.
What does this mean for lifters? CrossFitters? Strength and conditioning athletes? It means that by utilizing contraction in the lower abs during lifts, we can maintain a neutral relationship between the trunk and the pelvis. If that relationship changes via too much lumbar extension or flexion, anterior or posterior pelvic tilt, or other instability, then it can at best not transmit force effectively and at worst result in an injury. It also means using spinal stabilization exercises in order to create endurance and habit for good spinal position.
Dr. McGill’s “big three” exercises can train help train this endurance and habit. In this video, he talks about four total exercises — the curl up variation, the bird dog, the side plank, and a moving plank on a ball. I know what you’re thinking: it looks like silly conventional fitness crap. These exercises aren’t supposed to build back strength, but instead they increase endurance in the back’s postural muscles so they can maintain a good, neutral position. The key to these movements is proper position, then endurance. They also teach the “skill”, or motor program, of what a correct spinal position is. Most people are in a perpetual state of instability with their spine; sitting in flexion or standing in hyperlordosis, for example. Ideally the trainee would work on their posture throughout the day in congruence with these prehab/rehab exercises, and they would improve their spine’s default position.
A for effort, but this spinal position is problematic.
Given the increasing participants we have in lifting, CrossFit, powerlifting, Olympic weightlifting, and other related activities, there will always be injuries, particularly in the lower back and sacral area. Usually these injuries can be prevented with better awareness, coaching, and physical preparedness. By using the “big three” exercises in a warm-up and/or cool-down in training, trainees can be taught what is “correct” and self-diagnose what is “wrong”. Compliment it with improved coaching of the barbell lifts and it’s possible to prevent injuries, or at least the severity.
Give these movements a try in your training. Don’t expect them to have immediate impact, but look for long-term improvement. Start being self aware of what your trunk and pelvis are doing throughout the day, especially when lifting.
The press is a fantastic exercise because it integrates the entire body and creates the largest kinetic chain exercise; everything from the feet articulating with the ground to the hands holding the bar overhead. It’s a significant trunk builder, but press mechanics and strength are better expressed when the trunk is purposely contracted and tightened.
In this video you’ll see an example of a press without trunk tightness followed by reps where an emphasis is placed on tightness.
There’s something I cued her to on a few days later that made an additional impact: I cued contraction of the quadriceps after explaining the importance of making the entire body stable. If the quadriceps have tension, it will prevent the knees from unlocking. If the knees unlock as the press rebounds out of the bottom, the lifter loses some of that force application in the soft, unstable knees. Maintaining quadriceps tension prevents that force loss, but also helps provide a very strong, stable base to press from. Contracting the quadriceps with the entire trunk (with an emphasis on the lower abs) made Aly’s reps much faster and easier, even compared to the final reps in the above video.
Note that this emphasis on trunk stability via tightness and keeping tension on all relevant joints and muscles should be applied into every lift.
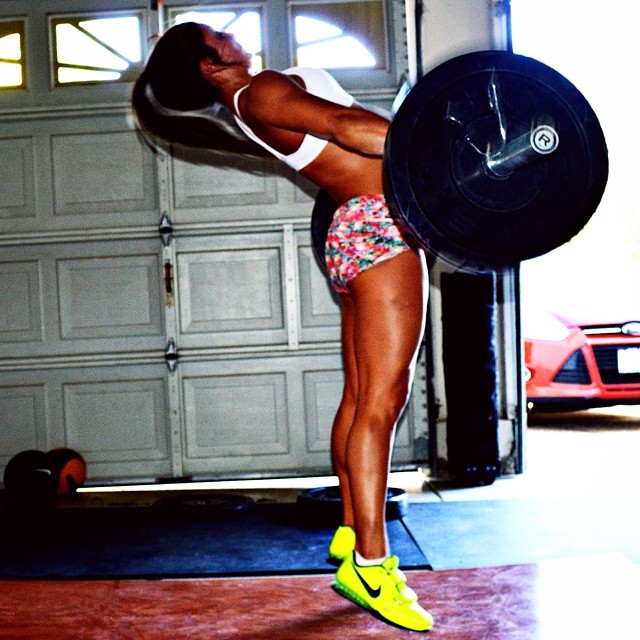
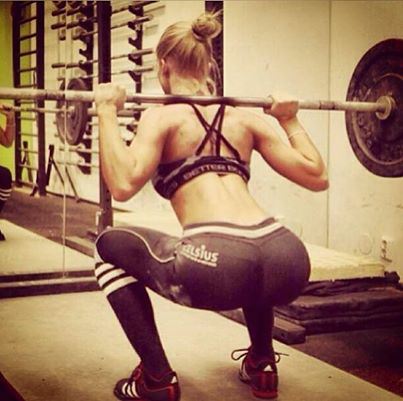
Friday I put the image to the right in the PR Friday post and asked people to explain what was wrong with it. There were a variety of good points, but I wanted to focus on the thing that stuck out to me. Before we begin, let’s all agree that the fact this girl is squatting is more important than not squatting; this concept always trumps any bickering that follows. With that being said, I teach that if you’re going to spend the time doing something, do it in the most efficient manner possible.
For the sake of giving this girl credit, she’s got a decent bar positioning, is trying to apply force with the lateral part of her foot (to prevent a navicular drop AKA collapsed arch which medially rotates the knee and hip), and she is probably at an appropriate depth (this picture is a weird angle). It’s possible she’s doing this weird-ass squat on purpose, but we’re gonna talk about it anyway.
As a lifting coach you’ll see many things wrong with a given lift — feet, knees, hips, trunk, shoulders, chest, elbows, grip, neck, etc. — and you can’t and shouldn’t try and correct all of them at once. Fix the thing that will have the greatest effect on the gross movement. In this case I’d start with the stance.
A wide stance inherently does not allow significant external rotation relative to foot position. External rotation allows the following:
1. It contracts the external rotators.
2. It lengthens, and therefore creates tension on, the internal rotators.
3. Therefore it creates greater tension about the hip. Tension around ball and socket joints means more stability therefore strength.
This is a what a pooping dog looks like. As a man.
4. It maximizes the musculature used about the hip. In this case, assuming a good foot-to-ground interaction, force is more easily distributed across the lateral portion of the thigh on both the front and the back. Valgus, or knees in, knee positioning removes this area of musculature and emphasizes the medial quadriceps. As I explained last week, external rotation also allows greater posterior chain involvement, even in the high bar.
5. Externally rotating the hip prevents impingement of the femur against the anterior portion of the acetabulum (i.e. the leg bone from impinging on the hip socket). Avoiding this impingement facilitates squat depth as well as maintaining proper trunk positioning while achieving depth; squatting with knees forward will impinge the hip and posteriorily tilt the pelvis, which makes the person look like a pooping dog. Rippetoe’s “Active Hip” (it’s a pdf) article talks more about this.
When I see poor external rotation, I see a number of ways a squat can be improved, so it’s something I want to focus on. In her case, I’d narrow her stance to about shoulder width and emphasize the external hip rotation. Chances are I would not have to change much else with her, but it would be the first thing to make a habit before worrying about anything else. The first Chalk Talk episode briefly talks about cuing external rotation, but I’ll get into in a later post.
A couple of years ago I wrote “Low Bar vs High Bar Squat” and it is still one of the most visited, and argued, posts on this site. I re-read the post and felt the need to update some of the information.
In the first post, I compared the positioning, mechanics, and utility of the high bar and low bar squats. All bickering aside, my final recommendation on which squat to use was:
If you’re gonna be a powerlifter, then use the low bar. If you’re going to compete in Olympic weightlifting, then use the high bar. If you have deficiencies in one area, then the other squat can improve that deficiency. If you can do both reasonably well and aren’t training for one of the barbell sports, then use both.
I do want to reiterate one point, and that is how the low bar squat should not be used for competitive weightlifting. Since weightlifting elements are common in CrossFit competition, I would also not predominantly use the low bar squat in CrossFit programming unless it was in the off-season. This is not any kind of attack on Mark Rippetoe or anyone who promotes the use of the low bar; the low bar is just not efficient for those purposes. Low barring will teach a trainee an inappropriate motor pathway for weightlifting as well as incorrectly developing the hip and thigh musculature.
To my knowledge I’m the one of the few people, if not the only one, who has gone to a USAW National event by primarily low bar back squatting. It definitely made receiving positions in the clean and snatch unnecessarily difficult as well as created mechanical problems (i.e. pitching forward when trying to squat out of the receiving position). After high barring consistently and dropping about 15 pounds of body weight, I was hitting the same PR snatch and CJ numbers with a weaker squat, and it was partially due to bettering the motor pathway of my receiving position and developing the musculature in a way that supports that pathway (The other variable of my improved numbers was that I significantly improved my weightlifting technique).
From a mechanical analysis perspective, it doesn’t make sense to low bar for weightlifting and it has not proved to be effective in my training or anyone I have coached. But enough about me, for gods’ sakes, let’s get to the amendments I have about the original Low Bar vs. High Bar article.
Hamstring tension during the high bar squat
In the first article I made a blanket statement saying, “the (high bar squat) ascent begins with zero hamstring tension due to knee flexion”. To review, if there is too much knee flexion, then there is not tension in the hamstrings since they cross both the knee and the hip. Yet, saying that all high bar squats have zero hamstring tension at the bottom position is not correct in all situations.
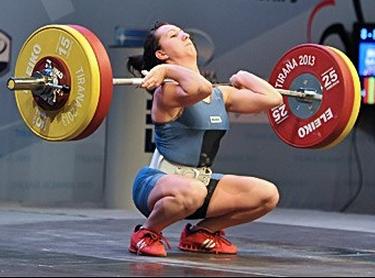
This is an ATG squat
There are different ways to high bar squat. One method used by weightlifters is essentially collapsing into the bottom and allowing the backs of the hamstrings to slam onto the calves in complete knee flexion. The knees usually jut forward and some people say the rebound occurs off of the ligaments of the knees, though it’s probably a combination of the soft tissue around the ankles, knees and hips. The rebound off the soft tissue and joints is used as a rebound to drive the weight up. It’s similar to catching a clean or snatch very quickly. This can be called “ass to grass” or ATG squats. Another method is similar, except instead of crashing into the bottom position, the weight is lowered under control until the same bottom position is met. These are also referred to as ATG squats, but the weight is lowered under tension.
This is a non-ATG high bar squat
Lastly, the bottom position of a high bar squat can be a couple of inches below parallel, much like the low bar squat. To quantify this, the crease of the hip would need to be at a lower level than the knee cap (i.e. the point in which the head of the femur articulates with the acetabulum would be lower than the top of the patella). The weight would be controlled to this bottom position, and then squatted up.
While there is more knee flexion than in a low bar squat, there is not complete knee flexion and therefore not complete slackening in the hamstring. The hamstring is obviously much more slack than a low bar squat, but it will have some tension, especially when the trainee is externally rotating the hips effectively. External hip rotation effectively stretches out both the adductors and at least the medial hamstrings, therefore it creates tension around the hip. This is how I coach the high bar squat, especially with beginners.
All of the text in this section serves to show that I no longer think there is zero tension at the bottom of a non-ATG high bar squat.
Net anterior/posterior knee forces during the high bar squat
This is a mega ATG squat that is rebounding off of all of the soft tissue
And all of the above text is important to make this point right here. Since there is adductor and hamstring tension applied in a non ATG high bar squat, these muscles apply a posterior force on the tibia. Therefore, the net force is not entirely anterior and therefore not as abrasive to the knees as originally thought. ATG squats will yield significantly higher anterior stress (i.e. the front of the knees), but ATG and regular high bar squats can still recruit hamstring tension on the ascent. If there is tension at the bottom of a non-ATG squat, and there is hamstring tension on the ascent (due to the hamstrings maintaining the back angle by their attachment on the pelvis), then the high bar squat can be excused from “knee wrecking” accusations.
In order to provide this tension the trainee would need to properly externally rotate at the hip, therefore making the high bar squat more difficult to master than I made it out to be in the first article when I said, “To learn how to high bar squat, put a bar on your back and squat all the way down with your knees shoved out.” A quality high bar squat will require good external rotation (to be discussed in another post and video).
The stretch reflex is still present in a high bar squat
Despite the pad, this is a pretty good high bar squat. And impressive if real.
Because there is hamstring and adductor tension at the bottom of a non ATG high bar squat, there is tension to execute a stretch reflex. The stretch reflex is one of the most important qualities of a low bar squat. Once a trainee starts mastering the low bar mechanics, I teach them how to “bounce” out of the hole with hip drive. The same thing can happen in the high bar squat, yet the intent and cues are different. Whereas in the low bar the trainee is aiming to “push the butt up” (a specific cue I found to be better than “drive the butt/hip up”), the high bar squatter will “drive the heels” while maintaining the external rotation.
Overall, the point in this section is to state that there is not complete knee flexion in a high bar squat, there is adductor and hamstring tension, and therefore there is a stretch reflex off of these muscles when coming out of the hole.
There is a difference
One issue that pops up occasionally is the idea that there is not a difference between the high bar and low bar. I guess the point is that there is not a mechanical difference, an adaptation difference, or that it doesn’t matter which one you do.
Some people may not have a noticeable difference in seeing or executing the two types of squat if they are a) very immobile, b) very uncoordinated, or c) squat with a wide-geared-powerlifting stance. Having crappy mobility would make it hard to see a difference between the two squat variants. Crappy mobility in the hips, knees, and ankles, would prevent a proper bottom position in a high bar. Crappy shoulder mobility would prevent a good rack in a high or low bar position (I’ve seen both). Therefore, when they attempt one or the other squat version, it just turns into a bastardized version of whatever their mobility permits.
The uncoordinated trainee may have the mobility to rack the bar or get into a bottom position, but he doesn’t have the coordination (or coaching) to execute the squat version.
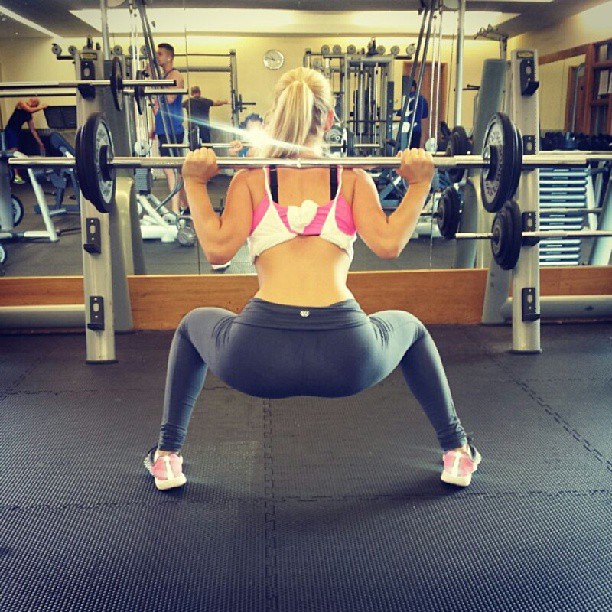
Lastly, wide stance squatters aim to have vertical shins, sit back very far, and lean over to achieve hip flexion. This style of squatting — which I am not a fan of — developed in order to take advantage of gear that resists hip flexion (i.e. it helps extend the hips AKA squat up). Wide stance squatting relies on gear instead of good external hip rotation to provide force. Wide stance squatting will also look nearly the same regardless if the bar is placed on the traps (high bar) or on the rear delts (low bar), therefore there won’t be much of a difference between the two squats because the mechanics are the same anyway.
Despite the fact that large weights have been squatted with these wide stance squats, it doesn’t use the non-geared anatomy efficiently, is therefore more injurious, and is not conducive to athletics, weightlifting, or general performance. But I digress.
In closing…
I ended up talking a lot about the high bar squat and neglected the low bar squat. I just needed to revise and explain the above statements about the high bar. The low bar is still what I would coach for raw powerlifting, but if someone were interested in competing in weightlifting or CrossFit, then I would have them high bar. It would just depend on the individual, as usual. One thing we can all agree on…it’s better to have squatted than to not have squatted at all.