Here it is – AC’s final installment on coaching the big lifts (and the press). There’s been a great response so far, so if you enjoyed this series, leave a note and ask for some more. I’m pretty sure it’ll be better than the sequel to Lonesome Dove.
The Squat, the Bench, and the Press are all out of the way now. The Deadlift is the last to talk about, for now. Hopefully up to this point the posts have been simple and clear enough for you guys to get a good base concept of “How-To.” There are many ways to teach a Deadlift and tons of cues you can use, so this is not meant to be a definitive guide to strictly follow. Take what you find informative and use it. Like the other articles I have written, I aim to make this easy to understand. With that said, we can get started.
Pay attention so you can get big traps.
There are 5 cues we are going to use for the Deadlift. The first one is going to be “Stance.“ If you have been to one of Mark Rippetoe’s seminars, all of this will seem really familiar to you. Walk up to the bar, then place your feet under the bar right where you tie your shoes (mid-foot). Your feet are also hip-width apart (inside of the smooth part of the bar). There should be a bit of distance between your shin and the bar. You aren’t going to touch the bar with your shins at this point, simply because the bar will roll away from your mid-foot when you flex your knees and we don’t want that.
The second cue is “Hands.” From this point, you are going to take a grip on the bar right outside of your legs – just far enough away so as to not interfere on the way up. Now you are awkwardly leaning over showing all the boys your milkshake. Perfect.
The third cue is “Shins.” WITHOUT rolling the bar in any fucking direction (so help me god if I see anyone do this I’ll fucking find you) you are going to bring your shins to the bar. Let’s look at that sentence again “You are going to bring your SHINS to the BAR.” This “shins to bar” movement will set the knee angle for the pull off the floor. Lastly, with this “Shins” cue you are going to apple slight pressure into your elbows by opening your knees. This is just going to help you get your back into a better position.
The Fourth cue is “Squeeze.” At this point, you’re going to put your back into extension by squeezing your chest up. You should feel a wave of extension all the way down your back. You are squeezing as tightly as possible. Remember, you are about to pull a lot of weight off the floor. Your back is going to anchor down your hips so your hamstrings can do some work.
The very last thing you are going to do is actually pull the bar off the floor. This is real simple. Use the cue “Pull.” You are going to smoothly pull the bar off the floor and stand all the way up. The way this works is that you are going to imagine driving your feet through the floor – almost as if you are pushing the floor away from you. As the bar begins to leave the floor, your knees constantly extend until locked at the top. Once you are at the top you are maintaining good extension and your chest is still up.
Now to visually put all that information together. Chris pulls 700+ here. It’s pretty fucking textbook, besides some shaking, it’s pretty god damn spot on.
Here are 2 more close-up pulls for you to watch. I really don’t like linking this video because this was my worst meet and I don’t like linking my own shit, but it’s more for you guys to visually see the set-up and execution. It should be cue’d up to the Deadlift portion. If not, click to 1:31.
Feel free to comment with questions on anything or maybe I left something out. Thanks for reading.
Scott representing the 70sBig face at his bachelor party in front of what appears to be a ’57 Chevy. Bonus points for the beard.
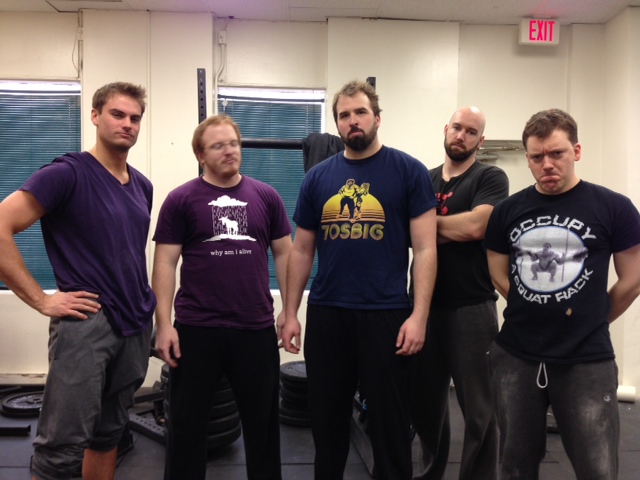
Nick and the CF Annandale crew (host site of three 70sBig seminars) made a nice little group shot. Except for nobodystopstheblob, of course.
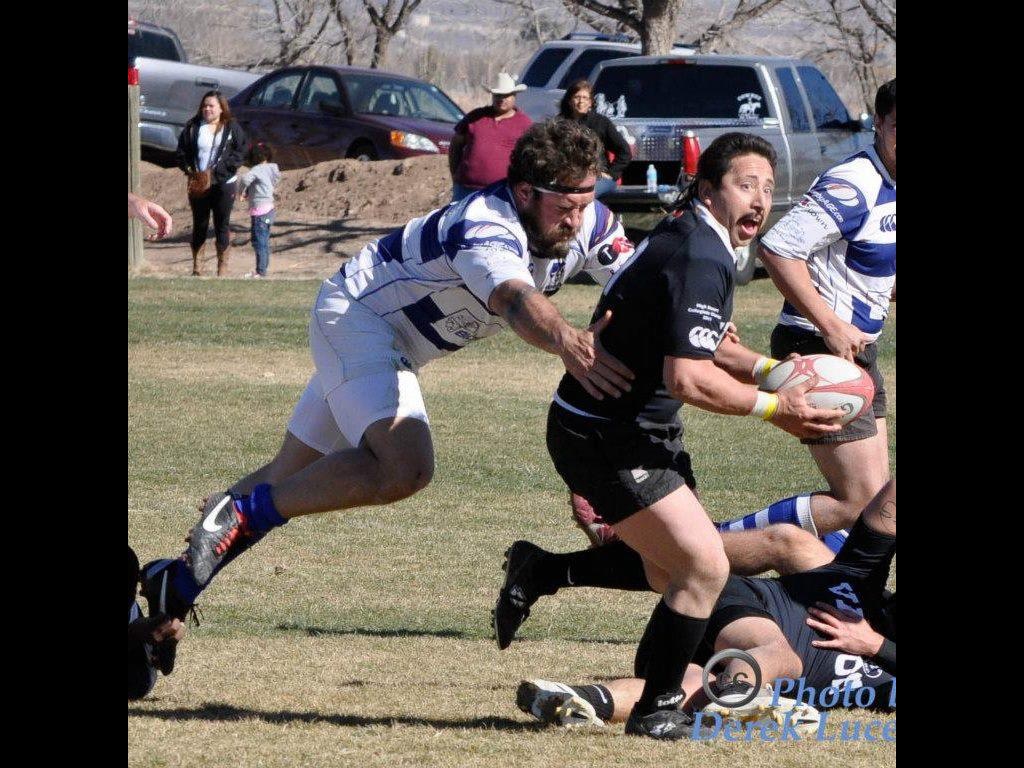
Kevin didn’t tell me if he’s the Pedro-lookin-dude with the sweet stache, or the headband-wearin’ bearded fella tacklin him, but either way, we get the point: Rugby’s rad.
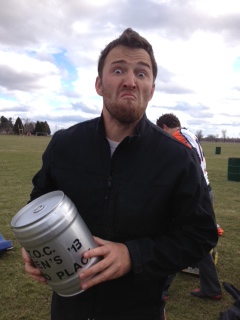
Did I mention rugby’s rad? Here’s Joshua after a tourney, sporting the 2nd place keg. A little work on the face, some extra jaw-juttin’, and he might be getting that 1st place keg soon.
James is 47 and squats 440 @ 198lbs bodyweight. Get started, kids. You might beat him in 20 years. Maybe. Or not.
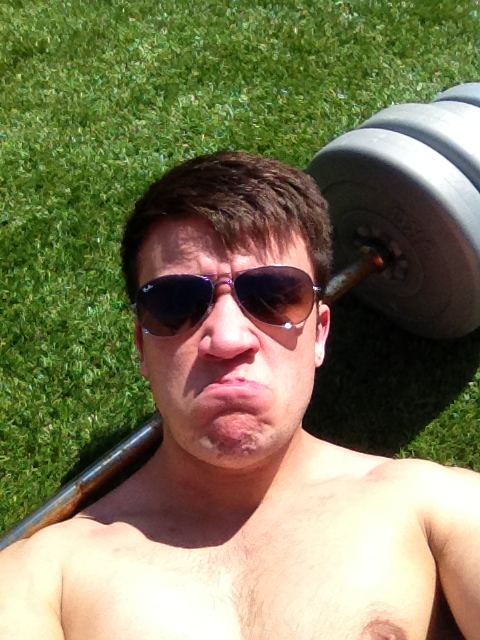
Reece gets it. Grass, weights, aviators, and a nip slip? He’s clearly been paying attention. Good job.
This is a technique I use with some of my lifters to increase their confidence on the bench press. It’s not a new idea, and people have been using it since the dawn of time, but it’s something we haven’t discussed on the site, and I get a lot of questions about it. I call it the “Over Warm-Up (OWU).” It’s a very technical and marketable name, I know. What does it mean? What do you think it means? It means you warm up to a heavy single before your work sets. Complicated stuff.
It might not have a sexy name, but it works. I’ve used this with a quite a few lifters to build confidence on heavy benches and to get them past long-term sticking points. In the past few months, RoryT used it to go from a 285 max bench to hitting 300 for the first time, then a couple weeks later, crushing 300×2. Jess used this technique to handle 95lbs dozens of times before her meet last weekend, where she hit two easy Meet Bench PRs. Many guys over on the LHS Forums are using it with success. You could also use it for various other lifts, like presses, push presses, even squats – though I think it’d be a pretty terrible idea on deadlifts. The target audience for this approach will be primarily novices and intermediates. If you’re an advanced lifter, chances are you’re not likely to benefit much from it, as you’ve already had years to master the mental aspects of the main lifts, and you’re quite capable of getting psyched up for a heavy PR single.
However, many lifters will find themselves “nervous” about certain weights, especially in the beginning stages of getting stronger. Typically, these hurdles revolve around a combination of big plates and 25lb plates. The weights I’m talking about here are usually 185, 225, 275, 315, 365, 405, etc., though the OWU can be used for any mental sticking point (the 200 and 300lb benchmarks can be just as intimidating as any other, even though they don’t look that special on a bar), or even just to include some heavy practice.
I can’t stress enough that you have a partner lift/spot your OWU, especially as you first tinker with it. Never pick a weight you can’t handle – if you are EVER missing a rep on your OWU, you’re doing it way, way wrong. You need to pick a weight that is well within reach – it’s not supposed to tire you out, or require a psych-up. It’s not an excuse to get greedy and “max out.” It’s just something to stomp on until it’s dead. Then you move on to the next enemy, and stomp it. Here are a few examples of how I implement it.
Example A: The Novice
Most novices should be on a simple linear progression, and our imaginary example is benching every other workout for 3×5 (or 3×5+, going for max reps on the last set). Let’s say they’ve gotten their LP from 165 for 3×5 to 212.5 for 3×5, and they’re now adding 2.5lb (or less) per workout and trying their damn hardest to continue progressing, with visions of 300+ in their head. This person would normally warm up to 212.5 like so:
45 x Lots, 95×5,5, 135 x 5, 185×2-3, 200×1, Work Sets @ 212.5.
Adding in an OWU at 225 is perfect for this person. Not only will they get used to handling 2 plates, they will KNOW they can hit it any day of the week, helping them feel more confident about getting up to it for their 3×5 work. Their warmup would now look roughly like this:
45 x Lots, 95×5,5, 135 x 5, 185×2-3, 205×1, 225×1 (OWU), Work Sets @ 212.5.
They would use 225 as their OWU for a few weeks until it was laughably easy, or until their work sets have actually caught up to that level (in this case, 225). At that point, they can either ditch the OWU for awhile, or move it up in 5-10lb increments if they enjoy feeling a bit heavier singles before their work sets.
Again, please note that a proper OWU is NOT heavy enough to constitute a large amount of work. It should not be a grinder. It should not impede the lifter’s ability to perform their work sets. Take a few minutes of rest after the OWU before your work sets, just as you would after your final normal warmup.
Example B: The Intermediate
Let’s say we have a typical intermediate lifter using the Texas Method. He got his linear progression from 205 3×5 up to 245 for 3×5 after a couple months of hard work and proper dieting and too many resets. He’s gone from benching around 225 for a single to around 285 or so on a good day, but something about 275+ just makes him a bit nervous. On his Intensity Day, he’s trying for 5RM’s in the 255 range, and his Volume Day is starting at 225 3×5, because he refuses to use less than 2 plates for his Volume Day.
This lifter should utilize the OWU on their Volume Day, but not on their Intensity Day. In this case, I would have them work up to 275 and then backing down to their work sets. It would look something like this:
45 x Lots, 135 x 5,5, 185×5, 225×1-2, 255×1, 275×1 (OWU), 225×5,5,5
The lifter would NOT use the OWU on their Intensity Day, as they should conserve every bit of energy they have for a big PR. The Intensity Day would still look like this:
45 x Lots, 135 x 5,5, 185×5, 225×1-2, 255×5 (PR)
Note: I prefer TM lifters to use as little supportive gear on their Volume Day as possible when they’re a ways out (IE, more than 6-8 weeks) from a meet. This means they would usually use no belt or wrist wraps on VD for bench, even if they use them on ID. The OWU is an exception – it would be acceptable to “gear up” for it, especially when first implementing it. Of course, keep in mind 132lb Jennifer Thompson doesn’t wear a belt for her 300+ raw bench, so…just sayin’. After a few weeks of using wrist wraps and a belt with 275, the lifter could then practice dropping the gear, or slowly increasing the weight of the OWU. Preferably, they’ve decided to enter a meet, which leads us to…
Example C: The Competitor
Another great use for the OWU is to practice some simple raw paused work on the bench, especially near a meet (starting 4-6 weeks out or so would be appropriate). Again assuming a typical TM template with a Vol/Int day each week, I would also have this lifter use the OWU on their Volume Day before their work sets, but in this case, I would have them practice their opening (paused) bench attempt. This is an excellent way to add in some practice getting used to the commands. It’s particularly helpful for USAPL lifters who might experience long “start” and “rack” commands, depending on the judge. As they get closer to a meet, the pause should be slightly longer, and the speed coming off the chest should be noticeably improved. At the meet, they’ll have 100% confidence in their opener.
The OWU is a tool that can be used effectively. It is by no means required in all successful programs, but give it some consideration, and feel free to play with it in your own programming. You might like it, and hopefully, it will lead to lots of new PRs.
Here’s the third installment of “AC teaches you how to do stuff more awesomely.” So far, he has gone over some tips on how to press better and how to bench better. Today, he goes over how to coach the squat.
There are two basic variations of the back squat: High Bar and Low Bar. They’re two different squats, but there are semi-similar ways to go about learning/doing/coaching them.
I want to help you teach the squat in general. First and foremost, you are going to to have the athlete stand in front of you like a mirror. Next, you are going to tell them to place their feet shoulder width apart. Just like the grip on the bench, this stance will provide the longest ROM with the most musculature utilized in the lift. It’s similar to the bench in that it’s harder to put your femurs into external rotation the wider you go (shoving your knees out). Next, their toes are going to be slightly pointed out. This will allow the athlete to shove their knees out to perform full ROM and get external rotation more than if their toes were pointed straight. If the toes are straight (most athletes don’t have the mobility to accomplish toes straight and knees out) and the athletes knees are forward instead of out all that muscle and bone and fleshy area of the hip/femur mash into one another making it harder to achieve depth. With that said, have the athlete squat down to depth and stay down there. Note: this is without the bar. Have the athlete take his hands, put his palms together and with his elbows, shove the knees out. All of this is being down while maintaining extension in both lumbar/thoracic spine (WE ARE STILL AT THE BOTTOM OF THE SQUAT).
Now this leads into the low-bar squat. Low bar uses a little more hamstring than a high bar, but if your athletes are doing a lot of cleans (full cleans) then the high bar may be of more use to you because the squat in the clean is similar to a high bar squat.
In case I lost your attention…
From there you are going to walk around behind the athlete and place your hands on their low back/hips and apply slight pressure. The weight should be placed right over the middle of the foot, roughly where you tie your shoe laces. THIS IS WHERE ALL THE WEIGHT IS ON A LOW BAR. You are then going to tell them to “DRIVE” their hips into your hands. This emphasizes “Hip Drive,” which is what low bar squatters use to rebound out of the hole.
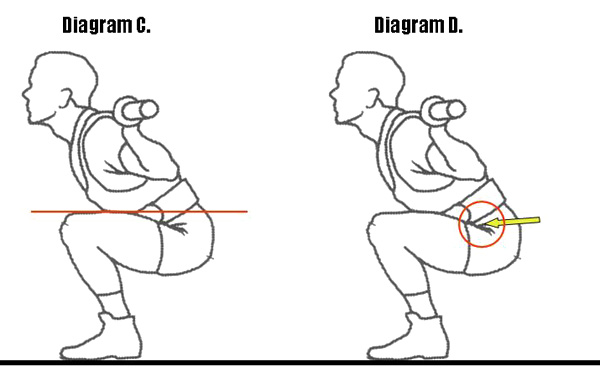
Notice my hips driving me out of the bottom. Also notice how I maintain my bar position because my spine is in extension. Have them do this once or twice to get a feel for it. Another thing to note here: Their head position is neutral with their eyes fixed on a reference point a few feet in front of them. They ARE NOT LOOKING UP. Looking up destroys the tension that you attained through eccentric contraction in the hamstrings. The hips and knees move forward losing that stretch reflex. You can demonstrate this by doing a 3rd and 4th rep with the athlete in this demo phase. Have the athlete look at the ground a few feet in front of them and then command them to drive up (hands still on the hips), then have the athlete look up as hard as they can (like most coaches tell them too). Squatting should be significantly harder now. Keep in mind this is for the low-bar. You can get away with that more in the high-bar, but it’s not a good spinal position.
Now you can take them to the barbell. Start with just the bar and then move from there. For the low bar, the barbell sits along the spine of the scapula. It’s almost like a ridge that your body creates when you place yourself under the bar. When the athlete is under the bar, move so you can be in a position next to them. From there you are going to give them the last little touch up cues. When they unrack the bar it should coincide with a large breath of air and extension of the spine. Reference my video if you need to look again. Also, when they unrack it their elbows should be applying downward pressure on the bar. Do not let their elbows slack down. All the weight of the bar is on their back NOT on their arms. Again, notice in the video how my elbows stay high. They are going to take roughly two steps back and take the same stance they had when you were teaching them before. Now right before they go, you will tell them 2 last things: A: They are going to have to shove their knees out without their elbows, and B: They are going to REBOUND out of the bottom, so basically they aren’t pausing at the bottom.
Notes:
Take a big breath and hold it for each rep. Each rep gets a new breath and it gets held FOR THE WHOLE REP.
At all times their eyes should be fixated on a reference point. It is hard to maintain balance if they are looking around.
Cues for Low Bar Squats:
“Knees out.” The athlete shoves their knees out for external rotation. Easier ROM, more musculature in the lift.
“Mid-Foot.” If you see the athlete shifting their weight, it can change the mechanics of the squat. This cues them to put their weight back on the middle of the foot.
“Drive.” This will remind the athlete to use his/her hips when they rebound out of the hole.
“Bounce.” This is tough for some people to get, but they essentially have to rebound out of the hole off of their hamstrings, using that eccentric contraction we talked about earlier. This is more of an advanced cue – for beginners, think “control down, fast up.”
Moving on to High-Bar Squats
The High Bar is similar in a few ways, but the bar placement is placed (higher) on the traps. This bar placement changes a few things. The torso has to maintain a more vertical position throughout the lift. The more vertical the torso, the more acute (closed) the knee angle will be. The “knees out” cue stays the same – it’s crucial for both styles of squats. The cue that changes here is “Mid-Foot.” The weight is emphasized on the heel, NOT the mid-foot. Put emphasis on “heels” on the way down and up. “Knees out” is just as important — common for lifters to bring them in at the bottom and on the way up in the high bar variation.
For more discussion on Low Bar and High Bar squats, see Justin’s article on the subject. Remember, neither of these articles is telling you exactly which is better for your situation, or demonizing either variation. If you’re confused, discuss the subject with your fellow lifters, your coach, and contemplate the issue quietly in the godswoods. Or, you know, try ’em both, and shit. If you can’t hit 4 or 5 plates with both variations, you should probably just do more of them. – Jacob
The crowd had no idea. The judges – they didn’t know either. Hell, the lifter didn’t even know.
But I knew.
I knew this was a huge PR. I knew this was for the win – for the Texas State Championship. I knew my lifter could pull this deadlift, and with it, not only finish 9/9, get her first 600lb total, her first 300 Wilks score, and finish the trifecta – PR’ing her squat, bench, and dead all in the same meet, but also – she could win the freaking meet.
And she did.
I coached my special lady friend Jessica this weekend at the USAPL TX State Meet, and it went well – really well – and I’m proud of her, naturally. Luckily, there are lessons to be learned here by any competitor.
First: You have to make your lifts. The most successful powerlifters (and most of the best Olympic lifters) usually make more attempts than their competition. How do you make lifts? You have a plan, and you start conservatively. Jessica and I had talked for weeks about her squat and bench attempts. She was so confident in her 2nd attempts that there was no chance of missing them. They also happened to be 2.5kg meet PRs – what I call “chips,” meaning the smallest PR possible. Her training taper was based around these attempts – and also for modest 3rd attempts that were well within her reach.
Jess squatting >200lbs for the first time. She lost her tightness out of the hole a bit and still fought for 3 white lights.
Second: Preparation. You can’t go into a meet having never touched 500 pounds and expect to pull 600. The Texas Method approaches that Justin and I use make sure that lifters get used to heavy weight before a meet. Jess squatted 185×2 about a week out (as part of an ascending 3×2 day) and it looked like the easiest thing in the world. When 204 was loaded on the bar, it was a perfect third call. Tough, but possible, and she ground it out for her first 200+ squat (and a 7.5kg meet PR!). On her bench, as I said, she had a 2.5kg meet PR on her 2nd, at 45kg/99lbs. Our “best case/worse case” plan called for either 47.5 or 50kg on her third, and as bad as she wanted the bigger number, after watching her second, I called for 47.5kg – which she nailed. This brings me to my next point.
Third: Trust. Trust in your coach (or handler – and yes, they’re different). Trust in your training. Trust in your taper. Trust in your strength. When I called for the 47.5kg bench instead of 50kg, Jess didn’t fight me – she trusted that I saw that her second attempt wasn’t as fast as I wanted to see, or as she thought it felt. She trusted that I knew 50kg might just be a little too much that day, and that she’d need every kilo for her total. She promptly went out and smoked 47.5kg, and will get 50kg (and then some) at her next meet. As her coach, I ensured that she (finally) got her first 100+ pound competition bench, and she thanked me later.
Trust came into play even more with the deadlift. She had suffered an injury with a kitchen knife – she nearly cut off the tip of her middle finger while unloading the dishwasher – and hadn’t been able to pull very much at all for about a month before the meet. She’d pulled 280 in the gym before the accident, and we decided that, best case, we’d go for 127.5kg/281lbs on her third as a very modest PR, but only if things went perfectly. Guess what? We never called 127.5.
Fourth: Awareness. Shit comes up in a meet. With Jess, she understands that she isn’t always the strongest person in her class. She competes to improve her own total, and to consistently hit PRs. She has a blast chipping away at each meet and slowly improving her total. Powerlifting, like every strength sport, takes years of practice for most to become the best, and Jess is patient. However, you must always be aware. For this meet, she was scheduled to lift as a 60kg/132lb lifter. Once the roster came out, I saw that the class was stacked, and asked her to lift in the 67.5/148 class. There were only 2 other ladies pre-registered in the class, so I knew she’d at least get a third place medal, and without having to suffer to make weight, she’d have an even better shot at big PRs. She stuffed her face all week, ate a ½ pound hamburger the night before (with two desserts!), and weighed in at 60.9kg Saturday morning. As soon as the squats started up, I knew she actually had a chance at taking the class. One girl, who was much stronger than Jess or the other, didn’t have much experience, and bombed out, leaving Jess and another lady to battle it out for first.
We stuck to the plan for the squat and bench, and Jess was 6/6 going into deads, 15kg out of first place. At this point, I gave her a set of headphones, sat her in a corner, and told her to stop looking at the projectors. She nailed her light 110kg opener, and her competitor opened up at 102.5 – cutting the lead down to 7.5kg. I had done my research on Jess’s competitor and had an idea of what she’d pull, and what Jess would need to pull to win. Knowing that the other woman had weighed in over Jess, I decided before deads even started that, on the third, I’d call for whatever it took to tie (and therefore win on bodyweight).
After the first pull, I called for a jump to 122.5kg (270lbs). Jess had been expecting ~117.5, but I was playing to win.
I told her to get cranked up (specifically, I said “What would Ben do?” Ben is another of my lifters that will deadlift almost anything I put on the bar) before the second pull, and she did – and made it look easy, giving us both confidence going into the third. Her injured finger held up, and her competitor had only taken a 10kg jump – dropping the lead to 5kg. I saw that she called for a 5kg jump on her third. If she missed it, Jess would need a 5kg increase (127.5/281) for the tie/win. If she made it, Jess would need a 10kg bump (132.5/292). I called for a small 2.5kg increase, so that Jess’s third only showed 125 on the scoreboard.
This is where it’s important to be aware. In the USAPL and most other federations, you can change your third deadlift call almost right up until you lift (technical note – read the rules, but basically, you can change it up to twice, until the bar is loaded or your name is called). Since there was another lifter in the flight between her competitor and Jess, I had plenty of time to change the final attempt. In this case, the other woman pulled her third successfully (with a lot left in the tank), and I immediately increased Jess’s third deadlift to 132.5kg/292lbs, without telling her what was going to be on the bar.
She got jacked up, yanked the earphones out, and I looked deep into her eyes. She knew this was going to be something heavy, and she knew it was important. But most importantly, she knew that I believed she could pull it. She stomped to the chalk bowl, breathed in as much oxygen as she could…
And she got it.
Jess makes her winning pull look easy.
I’m extremely proud of Jess for having the mental fortitude to have such a great meet. She trusted me, as her coach, to handle her attempts to put her in the best situation (in regard to both personal records and overall standing), and she got “in the zone” when needed. She followed our standard hydration and nutrition (read: forcing herself to get all the hydration and calories throughout the day), and she walked away with a gold medal. You can only beat who shows up – and most importantly, you should never beat yourself.